daikin air conditioner control panel instructions

The Daikin air conditioner control panel is a user-friendly interface designed to streamline cooling, heating, and fan operations; It offers intuitive buttons for mode selection, temperature adjustment, and fan speed control, ensuring efficient and comfortable climate management. Additional features like timers and eco modes enhance energy savings, making it a versatile tool for smart home comfort.

Overview of the Control Panel Layout

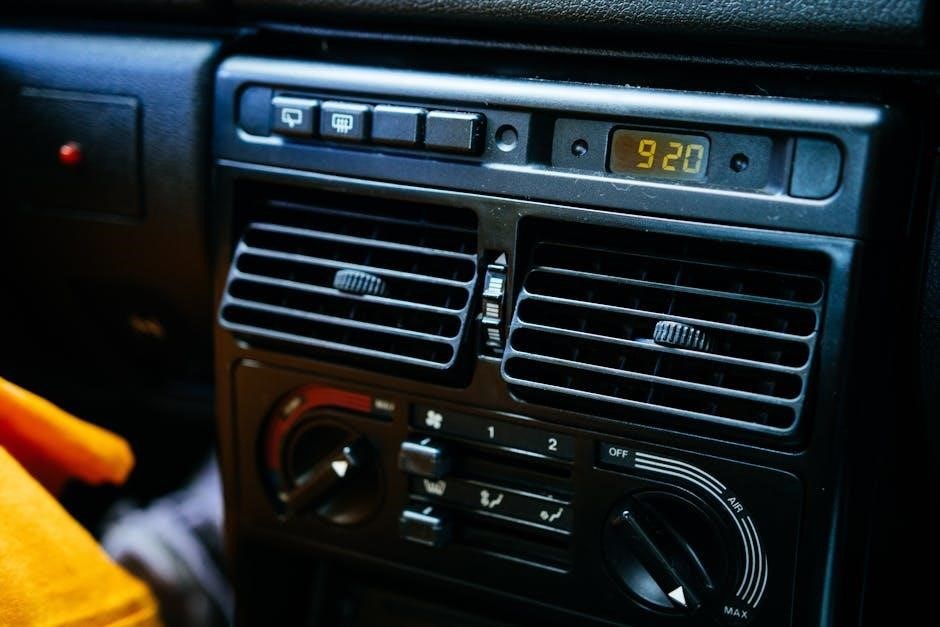
The Daikin control panel features a clean, intuitive design with a central display screen showing current settings. Buttons are logically arranged for easy navigation, with clear labels indicating their functions. The layout includes a power button, mode selection options (Cool, Heat, Fan), temperature adjustment controls, and fan speed settings. Additional features like timer, turbo, and eco mode are also accessible via dedicated buttons. The panel’s organized structure ensures users can quickly identify and adjust settings without confusion. This user-centric design makes it simple to operate the air conditioner efficiently, catering to both basic and advanced functionality needs;

Importance of Understanding the Control Panel

Understanding the Daikin control panel is essential for maximizing energy efficiency and comfort. It allows users to optimize settings like temperature, fan speed, and operating modes, ensuring the system runs efficiently. Familiarity with features such as eco mode, timers, and smart sensors enables users to reduce energy consumption while maintaining optimal performance. Proper use of the control panel also extends the lifespan of the air conditioner by preventing unnecessary wear and tear. By mastering the panel’s functions, users can tailor their cooling and heating experience to their specific needs, enhancing overall satisfaction and reducing operational costs.

Basic Components of the Daikin Control Panel

The Daikin control panel features a power button, display screen, mode selection buttons for cooling, heating, and fan, temperature adjustment buttons, fan speed control, and additional features like timer, turbo, and eco mode.

Power Button and Display Screen

The power button is the primary control for turning the Daikin air conditioner on or off, often featuring a backlight for easy visibility in low-light conditions. The display screen provides clear visual feedback, showing the current temperature, operating mode, fan speed, and any active features like eco or turbo mode. It also displays error codes if issues arise, helping users identify and address problems quickly. Understanding these components is essential for effective operation, ensuring users can monitor and adjust settings effortlessly.

Mode Selection Buttons (Cooling, Heating, Fan)

The mode selection buttons on the Daikin control panel allow users to choose between cooling, heating, or fan-only operation. The cooling mode lowers the room temperature, ideal for hot days, while heating mode warms the space during colder months. The fan mode circulates air without cooling or heating, enhancing air circulation. Each button is clearly labeled and illuminated, ensuring easy navigation. LED indicators confirm the selected mode, providing clear feedback. This straightforward design enables users to switch modes effortlessly, tailoring the system to their comfort needs efficiently. The buttons are designed for intuitive use, making it simple to adjust settings as desired.

Temperature Adjustment Buttons

The temperature adjustment buttons on the Daikin control panel enable precise control over the desired room temperature. The up arrow increases the temperature, while the down arrow decreases it. These buttons are intuitive and responsive, allowing users to fine-tune their comfort levels. The LED display screen shows the set temperature, providing clear feedback. Users can adjust the temperature in increments, ensuring the perfect balance for their environment. This feature is essential for maintaining optimal comfort, whether cooling or heating. The buttons are designed for ease of use, making temperature control a seamless process.

Fan Speed Control

The Daikin control panel includes fan speed control buttons, allowing users to adjust airflow to their preference. The buttons typically offer low, medium, and high settings, as well as an auto mode that automatically adjusts fan speed based on temperature. This feature ensures optimal air circulation while minimizing noise and energy consumption. Users can select the fan speed that best suits their comfort needs, whether for quiet operation or maximum airflow. The fan speed control is an essential feature for customizing the air conditioning experience to individual preferences.

Additional Features (Timer, Turbo, Eco Mode)

The Daikin control panel offers advanced features for enhanced convenience and energy efficiency. The timer function allows users to schedule operations, turning the unit on or off at specific times. Turbo mode provides rapid cooling or heating, ideal for quickly achieving the desired temperature. Eco mode optimizes energy consumption, reducing power use while maintaining comfort. These features, combined with smart sensors, enable automatic adjustments to ensure efficient operation. By utilizing these options, users can customize their experience, save energy, and enjoy a more comfortable living space with minimal effort.

Initial Setup and Configuration

Start by turning on the air conditioner and setting your desired temperature. Use the mode buttons to select cooling, heating, or fan operation. Ensure the display shows the correct mode and temperature for optimal performance.

Turning On the Air Conditioner

Locate the power button on the Daikin control panel, typically marked with a power symbol. Press and hold the button until the display screen lights up, indicating the unit is active. Ensure the display shows the current mode and temperature settings. Use the mode selection buttons to choose between cooling, heating, or fan operation. Adjust the temperature using the up or down arrows, and select the desired fan speed. Additional features like timer or eco mode can be activated for energy efficiency. Once configured, allow the system to stabilize for optimal performance. Refer to the manual for specific startup procedures.

Setting the Initial Temperature

Press the power button to activate the air conditioner. Use the temperature adjustment buttons (up/down arrows) to set your desired temperature. The display will show the set temperature and the current room temperature. Ensure the mode (cooling, heating, or fan) is selected before adjusting. For cooling, set a temperature between 18-24°C for efficiency. For heating, set between 20-25°C. The system will begin operating to reach the set temperature. Adjust as needed for comfort. Moderate temperature settings help optimize energy usage and performance. The display will update to reflect the current and target temperatures during operation.

Selecting the Operating Mode

Press the mode button on the remote control to cycle through available operating modes: cooling, heating, fan-only, or auto mode. In cooling mode, the system lowers the room temperature. Heating mode warms the space, while fan-only mode circulates air without cooling or heating. Auto mode automatically selects the most efficient operation based on the set temperature. Use the display screen to confirm the selected mode. Ensure the mode matches your comfort needs for optimal performance. The control panel will adjust settings accordingly, providing the desired climate control efficiently. Always check the display icons to verify the active mode. This ensures proper operation and energy use.

Understanding the Display Icons

The Daikin control panel features a range of display icons that indicate the current operational status. These icons include symbols for cooling mode, heating mode, fan speed, and timer functions. The snowflake icon represents cooling, while the flame icon signifies heating. Fan speed is shown with a fan blade symbol, and timer operations are indicated by a clock icon. Error codes may also appear, such as “E1” or “E2,” which require consulting the user manual for troubleshooting. Familiarize yourself with these icons to monitor and adjust settings effectively. The display provides real-time feedback, ensuring optimal control over your air conditioning system.

Advanced Features of the Daikin Control Panel

The Daikin control panel offers advanced features like timer functions, turbo mode for rapid cooling, eco mode for energy savings, and smart sensors for automatic adjustments.

Using the Timer Function

The Daikin timer function allows you to schedule air conditioning operations in advance, ensuring energy efficiency and convenience. By setting specific start and stop times, you can optimize your comfort without constant manual adjustments. This feature is especially useful for maintaining a preferred temperature when you’re away or during sleep hours. The timer can be easily programmed using the control panel, offering flexibility and peace of mind. Regular use of the timer can lead to significant energy savings, aligning with eco-friendly practices.

Activating Turbo Mode

Turbo Mode on the Daikin control panel maximizes cooling or heating performance for rapid temperature changes. To activate, press the dedicated Turbo button on the remote or control panel. This feature increases fan speed and compressor operation to quickly achieve the desired temperature; Turbo Mode is ideal for extreme weather conditions or when rapid cooling or heating is needed. It ensures efficient performance while maintaining energy efficiency, making it a convenient option for immediate comfort. Use Turbo Mode sparingly to optimize energy consumption and extend the lifespan of your air conditioner.

Eco Mode and Energy Savings

Eco Mode on the Daikin control panel optimizes energy consumption while maintaining comfort. It adjusts cooling or heating output based on room conditions, reducing unnecessary power use. By utilizing smart sensors, Eco Mode ensures efficient operation, lowering utility bills. This feature is ideal for eco-conscious users, as it minimizes energy waste without compromising performance. Activate Eco Mode via the control panel or remote for a balanced approach to energy savings and comfort. Regular use of Eco Mode helps extend the lifespan of your air conditioner and supports environmental sustainability.

Smart Sensors and Automatic Operations

Daikin’s control panel features advanced smart sensors that detect temperature, humidity, and occupancy, enabling automatic adjustments for optimal comfort. These sensors ensure efficient cooling or heating by maintaining consistent conditions without manual intervention. The system automatically switches modes based on ambient conditions, reducing energy waste. Smart sensors also support Eco Mode, further enhancing energy savings. Automatic operations streamline user experience, providing seamless comfort while minimizing effort. This intelligent technology ensures your space remains comfortable year-round, adapting to changing environments effortlessly.

Maintenance and Troubleshooting

Regularly clean the air filter to ensure optimal performance and energy efficiency. Refer to the control panel for error codes and reset options to address common issues promptly.

Cleaning the Air Filter

Cleaning the air filter is essential for maintaining your Daikin air conditioner’s efficiency and performance. Turn off the AC before removing the filter, typically located behind the indoor unit. Gently vacuum or brush off dust and debris. For stubborn dirt, rinse the filter with water, but avoid harsh chemicals. Allow it to dry completely before reinstalling. Regular cleaning prevents reduced airflow, higher energy bills, and potential system damage. Replace disposable filters as recommended. Clean filters every 1-3 months, depending on usage, to ensure optimal operation and indoor air quality. This simple maintenance step keeps your system running smoothly and effectively.

Understanding Error Codes

Daikin air conditioners display error codes to indicate specific issues. Codes like “E1” or “E2” signal problems such as sensor malfunctions or refrigerant leaks. Refer to the user manual or Daikin’s official website for code meanings. Some codes require professional assistance, while others may reset after addressing the issue. Ignoring error codes can lead to system damage or inefficiency. Always turn off the AC and unplug it before attempting repairs. For complex issues, contact a certified technician to ensure proper resolution and maintain warranty validity. Understanding error codes helps diagnose and resolve problems promptly, ensuring optimal performance and longevity of your unit.

Resetting the Air Conditioner

Resetting your Daikin air conditioner can resolve minor issues like error codes or unexpected shutdowns. To perform a soft reset, turn off the AC using the control panel, unplug it from the power source, and wait for 30 seconds. Plug it back in and turn it on to see if the issue is resolved. For some models, pressing and holding specific buttons on the remote control while plugging in the unit can also reset it. If the problem persists after resetting, contact a certified technician to diagnose and repair any underlying faults. Regular resets can help maintain optimal performance and prevent system malfunctions;

Common Issues and Solutions

Common issues with the Daikin control panel include unresponsive buttons, error codes, or uneven cooling. If buttons aren’t working, clean them gently with a soft cloth. For error codes, refer to the user manual or restart the unit. If cooling is uneven, ensure air filters are clean and vents are unobstructed. Remote control issues can often be resolved by replacing batteries or resetting the AC. If problems persist, check sensor functionality or consult a professional. Regular maintenance and timely troubleshooting can prevent major malfunctions and ensure optimal performance. Always refer to the manual for specific solutions tailored to your model.

Energy Efficiency and Optimization

The Daikin control panel optimizes energy use with features like inverter technology, reducing consumption by adjusting compressor speed. Eco Mode enhances efficiency, and smart sensors adapt to room conditions for optimal performance.

Using Eco Mode for Energy Savings

Eco Mode on the Daikin control panel optimizes energy consumption by adjusting cooling and heating operations. It reduces compressor speed and fan operation, minimizing power use while maintaining comfort. Smart sensors detect room conditions and automatically adjust settings to balance efficiency and performance. Eco Mode is ideal for consistent temperatures, lowering energy bills without sacrificing comfort. Regular use of Eco Mode contributes to long-term energy savings, making it a practical choice for eco-conscious users. This feature ensures your Daikin air conditioner operates efficiently, aligning with environmental and cost-saving goals.

Optimizing Temperature Settings

Optimizing temperature settings on your Daikin air conditioner enhances comfort and efficiency. Set consistent temperatures to avoid frequent adjustments, reducing energy consumption. Use the control panel to adjust temperatures in small increments, as significant changes can increase energy use. Enable smart sensors to automatically adapt to room conditions, ensuring optimal performance. Lowering the temperature slightly in cooling mode or raising it in heating mode can yield energy savings. Regularly reviewing and adjusting settings based on occupancy and seasonal changes further optimizes energy use, ensuring your Daikin air conditioner operates efficiently while maintaining a comfortable environment.

Smart Energy Management Features

The Daikin control panel offers advanced smart energy management features to optimize efficiency and reduce costs. The inverter technology adjusts compressor speed to match demand, minimizing energy waste. Smart scheduling allows you to program operating times, ensuring the AC runs only when needed. Energy monitoring provides real-time consumption insights, helping you track and manage usage. Additionally, demand response capabilities adjust output based on grid conditions, promoting sustainable energy use. These features work seamlessly with the control panel, enabling users to achieve significant energy savings while maintaining comfort and performance.

Remote Control and Smart App Integration

The Daikin control panel integrates seamlessly with both a remote control and a smartphone app, allowing users to adjust settings, monitor energy use, and schedule operations remotely for enhanced convenience.

Using the Remote Control

The Daikin remote control provides convenient operation of your air conditioner. It features buttons for power, mode selection, and temperature adjustment, allowing you to customize your comfort settings effortlessly. The remote also includes buttons for fan speed control and additional functions like eco mode or turbo mode. To use the remote, ensure it is pointing directly at the indoor unit’s receiver. Press the desired buttons to adjust settings, and the LCD display will show the current mode and temperature. Regularly replace the batteries to maintain functionality. This remote control enhances the overall user experience, offering precise control over your air conditioning system from anywhere in the room.

Connecting to the Daikin Smart App

To connect your Daikin air conditioner to the Daikin Smart App, begin by downloading and installing the app from your device’s app store. Ensure your air conditioner is compatible with the app and has a Wi-Fi adapter installed. Open the app, create an account, and follow the in-app instructions to link your device. Select your air conditioner from the list of available devices and confirm the connection. Once connected, you can control your air conditioner remotely, adjust settings, and monitor energy usage. This seamless integration allows for enhanced convenience and smart home functionality, making it easier to manage your comfort settings anytime, anywhere.

Controlling the AC via Smartphone

Once connected to the Daikin Smart App, you can effortlessly control your air conditioner using your smartphone. Adjust the temperature, switch between cooling, heating, or fan modes, and modify fan speed with just a few taps. The app also allows you to set schedules, activate eco mode, or turn on the timer function remotely. Receive notifications for maintenance reminders or error alerts to ensure optimal performance. This smartphone control enhances convenience, enabling you to customize your comfort settings from anywhere, while also optimizing energy efficiency and ensuring your home stays perfectly climate-controlled at all times.

The Daikin control panel offers a seamless and intuitive way to manage your air conditioner, enhancing home comfort with user-friendly features and energy-efficient solutions.

The Daikin air conditioner control panel features a power button, display screen, and mode selection buttons for cooling, heating, and fan operations. It includes temperature adjustment buttons, fan speed control, and additional features like timers, turbo mode, and eco mode for energy efficiency. The panel also supports smart sensors for automatic operations and integrates with the Daikin Smart App for remote control via smartphones. Designed for user convenience, it offers intuitive navigation, error code displays, and maintenance reminders, ensuring optimal performance and energy savings.

Final Tips for Effective Use

For optimal performance, regularly clean the air filter and check for error codes. Use eco mode and smart sensors to maximize energy efficiency. Adjust temperature settings wisely to balance comfort and energy savings. Familiarize yourself with the remote control and Daikin Smart App for convenient operation. Schedule routine maintenance to ensure longevity and reliability. Experiment with features like turbo mode for quick cooling and timers for automated control. Refer to the user manual for detailed guidance, and explore advanced settings to tailor the system to your needs. Proper usage ensures a comfortable and energy-efficient experience with your Daikin air conditioner.

carnival breeze deck plan pdf

The Carnival Breeze deck plan provides a detailed layout of the ship, highlighting cabin locations, amenities, and public areas. It’s essential for planning your cruise itinerary effectively.

1.1 Overview of the Carnival Breeze Cruise Ship

The Carnival Breeze is a modern cruise ship designed to accommodate 3,690 passengers and 1,390 crew members. With 1,845 staterooms, it offers a variety of cabin types, including interior, oceanview, and suite options. The ship features multiple decks dedicated to relaxation, dining, and entertainment. Deck 14 is home to the Cloud 9 Spa, offering serene spaces like the Laconium and aromatic steam baths. Family-friendly amenities and accessible cabins ensure inclusivity for all travelers. The deck plan highlights public areas, such as pools, restaurants, and recreational spaces, making it easy to navigate. Whether you’re seeking tranquility or adventure, the Carnival Breeze provides a well-rounded cruise experience.

1.2 Importance of Understanding the Deck Plan

Understanding the Carnival Breeze deck plan is crucial for maximizing your cruise experience. It helps you locate your cabin efficiently and find nearby amenities. By familiarizing yourself with the layout, you can plan your day, whether it’s dining, entertainment, or relaxation. The deck plan also reveals accessible cabins and quiet areas, ensuring comfort for all passengers. Additionally, knowing the ship’s facilities, such as spas, pools, and recreation spaces, allows you to make the most of your time onboard. A clear understanding of the deck plan ensures a stress-free and enjoyable journey, helping you navigate seamlessly from one activity to another.

1.3 How to Use the Carnival Breeze Deck Plan PDF

The Carnival Breeze deck plan PDF is a valuable tool for planning your cruise. Start by downloading the printable version, which includes a legend explaining cabin codes and venue locations. Use the deck-by-deck breakdown to identify key areas like dining spots, entertainment venues, and recreational spaces. Locate your cabin by cross-referencing the deck number and room code. Check accessible cabin locations if needed. Familiarize yourself with public areas, such as pools, spas, and fitness centers. Plan your itinerary by noting nearby facilities and activities. For a digital experience, explore interactive deck plan tools that offer detailed cabin overviews. This guide ensures you navigate the ship effortlessly and make the most of your cruise experience.

Accommodation Options on Carnival Breeze

The Carnival Breeze offers a variety of accommodations, including interior, oceanview, balcony, and spa cabins. Accessible cabins and family-friendly options are also available, ensuring comfort for all passengers.

2.1 Types of Cabins Available

The Carnival Breeze features a diverse range of cabin categories to suit every preference and budget. Interior cabins offer a cozy and economical option, while oceanview cabins provide stunning sea vistas. Balcony staterooms are perfect for those who want to enjoy fresh air and panoramic views. For enhanced relaxation, Cloud 9 Spa cabins include exclusive access to spa amenities; Suites offer spacious living areas and premium services, ideal for special occasions or luxury seekers. Family-friendly cabins accommodate larger groups, and accessible cabins are designed for passengers with mobility needs. Each cabin type is strategically located across various decks, ensuring a comfortable and enjoyable stay for all guests.

2.2 Location of Accessible Cabins

Accessible cabins on the Carnival Breeze are thoughtfully located across various decks to ensure ease of access for passengers with mobility needs. These cabins are strategically positioned near elevators and key amenities, minimizing travel time and enhancing convenience. Many accessible staterooms are found on lower decks, such as Deck 1, which offers proximity to the ship’s main facilities. The Carnival Breeze deck plan PDF highlights the exact locations of these cabins, making it easier for passengers to choose a stateroom that suits their requirements. With a range of accessible options available, passengers can enjoy a comfortable and inclusive cruise experience tailored to their needs.

2.3 Spa Accommodations and Amenities

The Carnival Breeze offers luxurious spa accommodations designed to provide a serene retreat for passengers. Located on Deck 14, the Cloud 9 Spa staterooms feature exclusive access to spa facilities, including a thermal suite, aromatic steam baths, and a laconium. These staterooms are equipped with upgraded amenities such as plush robes, slippers, and priority reservations for spa treatments. The spa accommodations are perfectly situated near the Serenity Adult-Only Retreat, offering a tranquil environment for relaxation. The Carnival Breeze deck plan PDF provides a detailed overview of these spa staterooms, ensuring guests can fully immerse themselves in a rejuvenating experience during their cruise. This setup is ideal for those seeking a rejuvenating and pampering getaway at sea.

Deck-by-Deck Breakdown

The Carnival Breeze features 14 decks, each offering unique amenities and experiences. From relaxation on Deck 14 to recreation on Deck 11, the ship is thoughtfully designed.

3.1 Deck 1: Lower Deck Facilities

Deck 1 on the Carnival Breeze is the Lower Deck, primarily housing essential facilities and services. It features crew areas, engineering sections, and storage spaces. Passenger staterooms are absent here, focusing instead on operational needs. This deck ensures smooth ship operations, making it vital for the overall cruise experience. Access is restricted to authorized personnel, maintaining efficiency and safety. The layout is functional, with clear pathways for crew members. While not a hub for passenger activity, Deck 1 plays a crucial role in supporting the ship’s daily functions and ensuring a seamless journey for all on board.

3.2 Deck 14: Spa and Serenity Areas

Deck 14 on the Carnival Breeze is a serene oasis dedicated to wellness and relaxation. It features the Cloud 9 Spa, offering luxurious treatments, and the Serenity Adult-Only Retreat, perfect for unwinding. Guests can enjoy private access to spa amenities, including an aroma steam bath, laconium, and treatment rooms. The Serenity area provides whirlpools, sun loungers, and shaded seating, ideal for tranquility. This deck is designed for those seeking pampering and peace, with priority reservations for spa accommodations. Its layout emphasizes comfort and privacy, making it a haven for adults looking to escape and rejuvenate during their cruise.

3.3 Deck 11: Vista and Recreation Spaces

Deck 11 on the Carnival Breeze is a vibrant hub for recreation and relaxation, offering stunning ocean views. It features a variety of pools, including the popular Havana Pool, surrounded by comfortable loungers and shaded areas. The deck also hosts recreational activities such as mini-golf and a ropes course, perfect for adventure seekers. Dining options like the Guy’s Burger Joint and BlueIguana Cantina are conveniently located here, serving delicious meals throughout the day. Additionally, Deck 11 is home to entertainment venues like the RedFrog Rum Bar, where guests can enjoy tropical drinks and live music. This deck is ideal for those looking to unwind, dine, or engage in fun activities while taking in the breathtaking vistas of the sea.

Public Areas and Amenities

Explore Carnival Breeze’s public areas, featuring diverse dining venues, entertainment options, and wellness centers. These amenities cater to all preferences, ensuring a memorable cruise experience for everyone.

4.1 Dining Venues and Their Locations

Carnival Breeze offers a variety of dining options across its decks, each strategically located for convenience. The Lido Marketplace on Deck 10 provides casual buffet dining, while Guy’s Burger Joint and BlueIguana Cantina are perfect for quick, flavorful meals. For a more upscale experience, the ship features The Chef’s Table and Fahrenheit 555 steakhouse, both located on Deck 5. Additionally, the Havana Bar on Deck 5 offers Cuban-inspired cuisine and cocktails. These diverse venues ensure that every culinary preference is catered to, making dining aboard the Carnival Breeze a delightful and memorable experience for all passengers.

4.2 Entertainment and Leisure Activities

Carnival Breeze offers an array of entertainment and leisure activities designed to cater to all ages and preferences. The ship features the vibrant Liquid Lounge, a two-deck-high theater hosting live shows, musicals, and comedy acts. For music lovers, the Limelight Lounge showcases live performances by talented artists. Families can enjoy the WaterWorks aqua park on Deck 11, complete with water slides and a suspended ropes course. Additionally, the Havana Bar on Deck 5 provides live music and dancing, while themed parties like the 80s Rock Night keep the energy high. With so many options, passengers can effortlessly find activities that match their interests, ensuring a fun-filled and memorable cruise experience.

4.3 Fitness and Wellness Centers

Carnival Breeze boasts state-of-the-art fitness and wellness centers, ensuring guests can maintain their health and relaxation routines at sea. The Cloud 9 Spa on Deck 14 offers a serene retreat, featuring saunas, steam rooms, and treatment rooms for massages and other therapies. Adjacent to the spa, the fitness center is fully equipped with modern cardio machines, free weights, and strength-training equipment. Guests can also enjoy yoga and Pilates classes, or take a jog on the outdoor jogging track that wraps around the ship. For those seeking a more relaxed experience, the Serenity Adult-Only Retreat on Deck 14 provides a peaceful oasis with comfortable loungers and stunning ocean views. These amenities ensure a holistic wellness experience for all passengers.

Family-Friendly Features

Carnival Breeze offers an array of family-friendly features, including kids’ clubs, family-friendly cabins, and activities for all ages to ensure an enjoyable experience for everyone.

5.1 Kids’ Clubs and Play Areas

Carnival Breeze features age-specific kids’ clubs, such as Camp Carnival for younger children and Circle C for teens, offering engaging activities and safe play areas. These clubs are strategically located on Deck 11, ensuring accessibility and proximity to family-friendly cabins. The play areas are equipped with toys, games, and entertainment, allowing kids to socialize and have fun while parents relax. Additionally, the ship’s water park and outdoor recreational spaces provide additional play options, making Carnival Breeze an ideal choice for families seeking a vibrant and inclusive cruise experience.

5.2 Family-Friendly Cabin Options

Carnival Breeze offers a variety of family-friendly cabin options designed to accommodate families comfortably. These include spacious staterooms with extra bedding, such as sofa beds or upper pullman beds, to fit multiple passengers. Many of these cabins are located near kids’ clubs and play areas, making it convenient for families to access recreational activities. Some cabins also feature interconnecting rooms, ideal for larger families or groups traveling together. Additionally, family-friendly cabins are strategically placed on decks with easy access to pools, water parks, and entertainment venues, ensuring a fun and stress-free experience for all ages aboard the Carnival Breeze.

5.3 Activities for All Ages

Carnival Breeze offers an array of activities tailored for all age groups, ensuring everyone has an unforgettable experience. Families can enjoy water parks, including the thrilling WaterWorks with its slides and splash zones, while kids can engage in age-specific clubs like Camp Carnival and Circle C. Teens have their own dedicated spaces for socializing and entertainment. Adults can unwind in the Serenity Adult-Only Retreat or participate in fitness classes at the Cloud 9 Spa. The ship also features live shows, comedy acts, and interactive games, providing endless options for family bonding and individual enjoyment. With so much to explore, every guest can find something that suits their preferences.

Tips for Choosing the Best Cabin

Selecting the right cabin on Carnival Breeze involves considering factors like location, budget, and preferences. Opt for cabins near elevators for convenience or mid-ship for stability. Avoid noisy areas near entertainment venues and choose higher decks for scenic views. Families may prefer adjacent or suite-style accommodations, while couples might seek spa cabins for relaxation. Review the deck plan to ensure proximity to desired amenities, ensuring a comfortable and enjoyable cruise experience tailored to your needs.

6.1 Factors to Consider When Selecting a Cabin

When selecting a cabin on Carnival Breeze, consider factors like budget, cabin category, and deck location. Budget-friendly interior rooms are ideal for those who spend less time in the cabin, while oceanview and balcony rooms offer scenic views. Suites provide luxury amenities and extra space. Deck location is crucial—lower decks are closer to public areas like dining and entertainment, while higher decks offer quieter environments and proximity to pools and recreational spaces. Families may prefer cabins near kids’ clubs, while couples might opt for spa accommodations with exclusive access to wellness facilities. Accessibility is another key factor, with accessible cabins available on various decks. Review the deck plan to ensure the cabin aligns with your preferences and needs, ensuring a comfortable and enjoyable cruise experience.

6.2 Avoiding Noise and Crowded Areas

To ensure a peaceful cruise, consider cabin locations that minimize noise and crowds. Cabins near entertainment venues, such as bars, theaters, and nightclubs, may experience higher noise levels. Additionally, avoid cabins close to public areas like pools, buffets, and elevators, as these tend to be busier. The Havana Bar on lower decks can generate significant noise, especially in the evenings. Opting for cabins on higher decks, such as Deck 14’s spa and serenity areas, offers a quieter environment. Review the Carnival Breeze deck plan to identify secluded spots and ensure your cabin is far from high-traffic zones, maximizing your relaxation and comfort during the voyage.

6.3 Maximizing Your Onboard Experience

Maximizing your Carnival Breeze experience begins with strategic cabin selection. Choose a cabin near amenities you plan to use frequently to save time and effort. For instance, booking a cabin close to the spa on Deck 14 ensures easy access to wellness facilities. If dining is a priority, opt for a location near popular restaurants like the Lido Marketplace. Families with children may benefit from proximity to kids’ clubs on Deck 11. Additionally, cabins with ocean views or balconies enhance the cruising experience. Review the deck plan to identify key areas and plan your itinerary accordingly, ensuring you make the most of your time onboard and enjoy all the ship has to offer.

Additional Resources

Cruise Critic provides detailed reviews and insights into the Carnival Breeze deck plan, offering valuable information on staterooms, dining, and activities to enhance your cruise experience.

7.1 Downloading the Carnival Breeze Deck Plan PDF

The Carnival Breeze deck plan PDF is a valuable resource for planning your cruise. It provides a detailed layout of all decks, including cabin locations, dining venues, entertainment options, and wellness facilities. By downloading the PDF, you can explore the ship’s amenities and plan your itinerary effectively. The document is available on the official Carnival Cruise Line website and third-party cruise planning platforms. It’s printable, making it easy to reference during your trip. The PDF also includes legends and codes to help you identify cabin categories and accessible rooms. This tool ensures you make the most of your onboard experience by knowing what to expect before you sail.

7.2 Interactive Deck Plan Tools

Interactive deck plan tools offer a dynamic way to explore the Carnival Breeze. These tools allow users to click on specific areas of the ship to view detailed information about cabins, dining venues, and entertainment options. They provide a virtual tour of the vessel, enabling passengers to familiarize themselves with the layout before their cruise. Many platforms, including Carnival’s official website and third-party cruise planners, offer these interactive features. By using these tools, travelers can zoom in on specific decks, view cabin categories, and even check availability. This interactive approach simplifies planning and ensures a seamless onboard experience. It’s a modern and user-friendly way to navigate the Carnival Breeze deck plan effectively.

7.3 Cruise Critic Reviews and Insights

Cruise Critic offers valuable insights and reviews on the Carnival Breeze deck plan, providing firsthand experiences from passengers. These reviews highlight the pros and cons of various cabins, dining options, and onboard activities. Travelers share tips on selecting the best cabins, avoiding noisy areas, and making the most of their cruise experience. The feedback also covers the ship’s amenities, such as the spa, entertainment venues, and family-friendly features. By reading these reviews, potential passengers can gain a better understanding of what to expect and plan their itinerary accordingly. Cruise Critic’s comprehensive coverage ensures that travelers are well-informed, helping them make the most of their time aboard the Carnival Breeze.

The Carnival Breeze deck plan PDF is a vital tool for planning an unforgettable cruise, offering detailed insights into the ship’s layout, amenities, and cabin options.

8.1 Final Thoughts on Planning Your Cruise

Understanding the Carnival Breeze deck plan is crucial for a seamless cruise experience. By reviewing the layout, you can identify proximity to key amenities, avoid noisy areas, and select the perfect cabin.

Plan ahead by exploring dining venues, entertainment options, and family-friendly activities. This ensures you make the most of your time onboard. Happy cruising!

8.2 Making the Most of Your Carnival Breeze Experience

Maximizing your Carnival Breeze experience begins with a well-planned itinerary using the deck plan. Familiarize yourself with the ship’s layout to locate dining venues, entertainment spots, and relaxation areas.

Take advantage of spa amenities, family-friendly activities, and recreational facilities. Prioritize bookings for popular services and plan your day to enjoy all the ship has to offer. A little preparation ensures a memorable and stress-free voyage.

ninja foodi air fryer manual pdf

Welcome to the Ninja Foodi Air Fryer manual, your comprehensive guide to unlocking the full potential of this versatile kitchen appliance. Designed to help you master air frying, roasting, and more, this manual ensures safe and efficient cooking. Discover how to achieve crispy results with minimal oil and explore a variety of cooking functions tailored for delicious meals.

Importance of the Manual for Users

The Ninja Foodi Air Fryer manual is essential for users to understand safety guidelines, cooking functions, and troubleshooting tips. It provides detailed instructions for optimal performance, ensuring delicious results. By following the manual, users can unlock the appliance’s full potential, customize recipes, and maintain it properly for long-term use. This guide is your key to mastering the Ninja Foodi Air Fryer effortlessly.

Overview of the Ninja Foodi Air Fryer

The Ninja Foodi Air Fryer is a multifunctional kitchen appliance that combines air frying with additional cooking modes like roasting and dehydrating. Its dual-zone technology allows simultaneous cooking of different foods at varying temperatures. With a large capacity and smart lid technology, it offers versatility and convenience, making it a must-have for home cooks seeking healthy, crispy meals without excess oil.

Key Features of the Ninja Foodi Air Fryer

The Ninja Foodi Air Fryer boasts multiple cooking functions, dual-zone technology, and a smart lid for versatile cooking. Its large capacity ensures ample space for family meals.

Multiple Cooking Functions

The Ninja Foodi Air Fryer offers 11 programmable cooking functions, including pressure cooking, steaming, slow cooking, yogurt making, sous vide, air frying, baking, roasting, searing, sautéing, broiling, and dehydration. These functions provide endless culinary possibilities, allowing users to prepare a wide variety of dishes with precision and ease, making it a versatile addition to any kitchen.

Dual-Zone Technology

Dual-Zone Technology allows for simultaneous cooking in two independent zones with different temperatures and timers. This feature enables users to cook multiple dishes at once, such as frying and roasting, ensuring each is perfectly cooked. It enhances efficiency and convenience, making meal preparation faster while maintaining high-quality results, ideal for busy home cooks seeking versatility and precision.

Smart Lid Technology

Smart Lid Technology automatically detects when the lid is closed, switching between pressure cooking and air frying modes seamlessly. This innovative design ensures optimal performance for various cooking functions, eliminating the need for manual mode adjustments. It streamlines the cooking process, making it intuitive and efficient while maintaining high-quality results for diverse recipes and meal preparations.

Large Capacity

The Ninja Foodi Air Fryer features a spacious cooking basket, accommodating large quantities of food for family-sized meals. Its generous capacity allows for even cooking distribution, ensuring crispy and evenly cooked dishes without overcrowding. Perfect for batch cooking, this large capacity makes it ideal for preparing meals for gatherings or weekly meal preps with ease and convenience.

Safety Precautions

Always read and follow the manual carefully to ensure safe operation. Use oven mitts when handling hot surfaces, avoid overheating, and keep children away. Place the appliance on a stable, heat-resistant surface and never leave it unattended while in use. Follow cleaning and maintenance guidelines to prevent damage and ensure longevity.

Handling the Appliance Safely

Always handle the Ninja Foodi Air Fryer with care to avoid burns or accidents. Use oven mitts or tongs when removing hot dishes. Ensure the appliance is placed on a stable, heat-resistant surface. Keep children away while cooking. Avoid touching the hot basket or pan during operation. Never leave the appliance unattended when in use. Unplug it when not in operation to prevent overheating.

Electrical Safety Guidelines

For electrical safety, ensure the Ninja Foodi Air Fryer is plugged into a grounded outlet. Avoid using damaged cords or plugs. Do not submerge the appliance in water or expose it to excessive moisture. Keep the power cord away from hot surfaces. Never operate the appliance near water or in humid environments. Always follow the manufacturer’s guidelines for electrical connections to prevent hazards.

Cleaning and Maintenance Safety

Always unplug the Ninja Foodi Air Fryer before cleaning to ensure safety. Avoid using abrasive cleaners or metal scourers, as they may damage the non-stick coating. Clean the basket and pan with a soft, damp cloth and mild detergent. Dry thoroughly after washing to prevent rust or bacterial growth. Regularly empty and clean the drip tray to maintain hygiene and functionality.

Cooking Functions and Customization

Explore the Ninja Foodi Air Fryer’s versatile cooking functions, including air frying, roasting, and dehydrating. Customize settings to achieve perfect results tailored to your preferences.

Air Frying for Crispy Results

Air frying uses hot air circulation to cook food evenly with minimal oil. The Ninja Foodi Air Fryer ensures crispy textures by removing moisture from the food’s surface. Adjust settings like temperature and time for perfect results. Follow the manual’s guidelines to optimize air frying performance and achieve golden-brown finishes for fries, chicken, and more with ease and delicious outcomes.

Roasting for Perfect Meals

Roasting with the Ninja Foodi Air Fryer delivers tender, flavorful results by evenly circulating hot air. This function is ideal for meats and vegetables, achieving a caramelized crust while locking in juices. Follow the manual’s temperature and timing guidelines to roast to perfection, ensuring delicious, evenly cooked meals every time with minimal effort and maximum flavor.

Dehydrating Fruits and Vegetables

The Ninja Foodi Air Fryer excels at dehydrating, allowing you to preserve fruits and vegetables while retaining their nutrients and natural flavors. Using precise temperature control and air circulation, this function creates perfectly dried snacks or ingredients for meal prep. Simply arrange slices in a single layer, set the desired settings, and let the appliance work its magic for crispy, healthy results.

Troubleshooting Common Issues

This section helps resolve frequent concerns, such as the appliance not turning on, uneven cooking, or unusual noises, ensuring optimal performance and addressing potential issues effectively.

Appliance Not Turning On

If your Ninja Foodi Air Fryer fails to power on, ensure the power cord is securely plugged into a functioning outlet. Check for any visible damage to the cord or plug. Verify that the outlet is working by testing it with another device. Also, confirm that the appliance is properly assembled and the lid is closed correctly. If issues persist, consult the manual or contact customer support for assistance.

Food Not Cooking Evenly

If food isn’t cooking evenly, ensure the basket isn’t overcrowded, as this restricts air circulation. Check that the temperature and timer are set correctly for the selected function. Shake the basket halfway through cooking to redistribute food. Pat food dry before cooking to enhance crispiness. Regularly clean the appliance to maintain proper airflow and performance.

Strange Noises During Operation

Strange noises during operation may indicate improper basket alignment or loose parts. Ensure the basket is securely locked into place and all components are clean. Food residue or debris can cause unusual sounds. Regularly clean the appliance and check for blockages in air vents. If noises persist, refer to the troubleshooting section in the manual or contact customer support for assistance.

Maintenance and Care

Regular maintenance ensures optimal performance. Clean the air fryer after each use, dry thoroughly, and store in a cool, dry place. Check for food residue and replace worn parts as needed to maintain efficiency and longevity.

Cleaning the Air Fryer

Regular cleaning is essential for maintaining your Ninja Foodi Air Fryer. After each use, wipe the exterior with a damp cloth and clean the basket and pan with soapy water. For tough residue, soak parts in warm water before scrubbing. Avoid abrasive cleaners or metal scourers to prevent damage. Dry thoroughly after cleaning to prevent rust and ensure optimal performance.

Storing the Appliance

Store your Ninja Foodi Air Fryer in a cool, dry place away from direct sunlight and heat sources. Clean and dry all parts thoroughly before storage to prevent moisture buildup. Remove any detachable components and store them separately to avoid odors. Keep the appliance upright to maintain balance and prevent tipping. Avoid stacking heavy objects on top to ensure longevity.

Replacing Parts

For optimal performance, replace parts only with Ninja-approved components. Refer to your model-specific manual for guidance on identifying and ordering genuine replacements. Avoid using unauthorized parts, as they may compromise safety and functionality. Visit the official Ninja website or authorized retailers to purchase authentic accessories. Ensure compatibility by matching your appliance’s model number with the replacement parts.

Accessories for Enhanced Functionality

Enhance your Ninja Foodi experience with official accessories like dehydrate trays, racks, and non-stick baskets. These tools optimize performance and versatility, ensuring perfect results. Visit Ninja’s official website or authorized retailers to explore compatible accessories tailored for your model, elevating your cooking convenience and creativity.

Recommended Accessories

Enhance your cooking experience with non-stick baskets, dehydrate trays, and recipe books. These accessories optimize performance and versatility, allowing for perfect air frying, roasting, and dehydrating. Visit Ninja’s official website or authorized retailers to explore compatible accessories tailored for your model, ensuring enhanced functionality and convenience in the kitchen.

Where to Purchase Accessories

Accessories for your Ninja Foodi Air Fryer can be purchased from the official Ninja Kitchen website, ensuring authenticity and compatibility. Additionally, online marketplaces like Amazon and eBay offer a wide selection, though it’s crucial to choose authorized sellers for genuine products. Retail stores such as Best Buy or Walmart may also carry these items, allowing for in-person browsing. For specialized options, consider visiting kitchenware stores that focus on cooking gadgets. Always verify product compatibility with your specific model, such as the AF500EU or DZ201 Series, to ensure a perfect fit and optimal performance.

Downloading the Ninja Foodi Air Fryer Manual

Download the official Ninja Foodi Air Fryer manual from the Ninja Kitchen website or authorized retailers like Amazon. Ensure you have the correct model number for accuracy and access comprehensive guides to maximize your cooking experience.

Steps to Download the PDF Manual

Visit the official Ninja Kitchen website and navigate to the support section. Enter your appliance’s model number or product code to find the correct manual. Click the download link to access the PDF. Ensure your device is connected to the internet for a smooth download. Once downloaded, review the manual to understand setup, cooking functions, and troubleshooting tips for optimal use of your Ninja Foodi Air Fryer.

Official Sources for the Manual

The official Ninja Kitchen website provides direct access to the PDF manual for the Ninja Foodi Air Fryer; Additionally, trusted retailers like Argos and Ninja Kitchen Ukraine offer downloadable versions. Ensure you download from trusted sources to avoid unauthorized third-party redirects. This guarantees you receive the correct and most up-to-date manual tailored to your specific model.

Quick Start Guide

Unbox and wash the basket. Plug in, set temperature, and timer. Start with a simple recipe like fries. Explore preset functions for effortless cooking. Refer to the manual for detailed guidance and safety tips to enhance your first cooking experience. Find quick recipes and setup instructions in the included guide.

Initial Setup

Unbox your Ninja Foodi Air Fryer and wash the basket with warm, soapy water. Place it on a flat, heat-resistant surface. Plug in the appliance and familiarize yourself with the controls. Refer to the manual for specific setup instructions tailored to your model, such as the AF500EU or DZ201. Ensure all parts are securely in place before first use.

First Cooking Experience

Start with a simple recipe, like air frying fries or chicken wings. Preheat the appliance if needed, then add food to the basket. Adjust settings using the control panel, following the manual’s guidelines for temperature and time. Press start and let the Ninja Foodi work its magic. This initial cook will help you familiarize with its operation and inspire confidence for more complex dishes.

Advanced Cooking Techniques

Explore beyond basics with the Ninja Foodi’s versatile functions. Master air frying for crispy textures, precision cooking with temperature control, and creative use of the Smart Lid. Customizing recipes and combining cooking modes can elevate your dishes. Experiment with dehydrating, pressure cooking, and more to unlock the full culinary potential of your Ninja Foodi, ensuring every meal is a success.

Customizing Recipes

Customize your dishes with the Ninja Foodi by adjusting cooking times, temperatures, and seasonings. Experiment with marinades and sauces for enhanced flavors. The manual guides you in tailoring recipes to your taste preferences, ensuring each meal is personalized. From crispy air-fried snacks to tender roasted meats, unlock endless culinary possibilities with precise control and creative freedom.

Using Different Cooking Modes

The Ninja Foodi offers various cooking modes to suit diverse culinary needs. Air Fry mode delivers crispy results with minimal oil, while Roast mode ensures perfectly cooked meats and vegetables. Dehydrate mode allows for homemade snacks, and additional settings like Sear/Sauté and Bake enhance versatility. The manual provides detailed guidance on selecting the right mode for optimal results, helping you achieve restaurant-quality dishes effortlessly at home.

Comparing Ninja Foodi Models

Ninja Foodi models vary in features, capacity, and advanced technologies. From compact air fryers to multi-functional cookers, each model offers unique benefits for different cooking preferences and needs.

Differences Between Models

Ninja Foodi models differ in features, capacity, and technology. The AF500EU offers dual-zone cooking, while the DZ201 boasts a 2-basket design. Some models include Smart Lid technology for multi-functional cooking, while others focus solely on air frying. Capacities range from compact to large, catering to various household needs. Each model’s unique features ensure tailored performance for specific cooking preferences and requirements.

Choosing the Right Model

Selecting the ideal Ninja Foodi model depends on your cooking needs and preferences. Consider the capacity, number of cooking functions, and advanced features like dual-zone technology or smart integration. If you prioritize versatility, models with multi-functional designs are recommended. For budget-conscious users, compact models with essential features may suffice. Each model caters to different household sizes and culinary goals, ensuring you find the perfect fit.

The Ninja Foodi Air Fryer manual is your key to mastering this versatile appliance. By following the guide, you can unlock its full potential, ensuring safe and efficient cooking. Explore its features, customize recipes, and enjoy delicious meals with ease. This manual empowers you to make the most of your Ninja Foodi, transforming everyday cooking into a culinary adventure.

Final Thoughts on the Manual

The Ninja Foodi Air Fryer manual is an essential resource for mastering this versatile appliance. It provides comprehensive guidance on safety, features, and troubleshooting, ensuring users maximize its potential. With detailed instructions and customization options, the manual empowers home cooks to achieve crispy, delicious results effortlessly. By following this guide, you’ll unlock new culinary possibilities and enhance your cooking experience with confidence and creativity.

Encouragement to Explore More

With the Ninja Foodi Air Fryer manual in hand, take the next step by exploring its full range of features and capabilities. Experiment with new recipes, discover hidden functions, and push your culinary creativity. The manual is your gateway to unlocking endless possibilities, ensuring every meal is a delight. Dive in, explore, and elevate your cooking game with confidence and enthusiasm!

kenmore 80 series washer manual

Welcome to the Kenmore 80 Series Washer Manual, your guide to installing, operating, and maintaining your appliance․ This manual provides essential information for safe and efficient use, ensuring optimal performance and longevity of your washer․ By following the instructions, you can troubleshoot common issues, understand safety precautions, and make the most of your Kenmore washer’s features․ Refer to this manual for detailed guidance on proper installation, maintenance, and operation․

1․1 Importance of Reading the Manual

Reading the Kenmore 80 Series Washer Manual is crucial for safe and efficient operation․ It provides detailed instructions on installation, usage, and maintenance, ensuring optimal performance․ The manual highlights safety precautions, helps troubleshoot common issues, and offers maintenance tips to extend the washer’s lifespan․ By following the guidelines, users can avoid potential damages and ensure warranty compliance․ Take the time to review this manual thoroughly to maximize the functionality and longevity of your Kenmore washer while minimizing the risk of accidents or malfunctions․

1․2 Overview of the Kenmore 80 Series Washer

The Kenmore 80 Series Washer is a reliable and efficient top-loading washing machine designed for everyday laundry needs․ It features a durable construction with a robust agitator for effective cleaning․ The washer offers multiple wash cycles, including delicate and heavy-duty options, catering to various fabric types․ Its straightforward controls make operation simple, while the two-speed motor ensures quiet and efficient performance․ This model is known for its longevity and ease of maintenance, making it a popular choice for households seeking a dependable appliance for years of service․

Safety Precautions and Operating Instructions

Always follow safety guidelines to prevent accidents․ Read all instructions carefully before operating the washer․ Ensure proper installation and maintenance to avoid hazards․ Keep children away during operation․

2․1 General Safety Guidelines

Always read and follow the safety instructions provided in the Kenmore 80 Series Washer Manual to ensure safe operation․ Keep children away from the washer while it is in use․ Never overload the machine, as this can cause imbalance and damage․ Ensure the washer is installed on a level, sturdy surface to prevent tipping․ Avoid using the washer near water or in humid conditions to reduce the risk of electrical hazards․ Keep the area around the washer clean and dry to maintain safety and efficiency․ Regularly inspect hoses and connections for signs of wear or damage․

2․2 Understanding Safety Symbols and Warnings

The Kenmore 80 Series Washer Manual includes important safety symbols and warnings to ensure safe operation․ Familiarize yourself with these symbols, such as the warning triangle, which indicates potential hazards․ Symbols may alert you to risks like hot surfaces, moving parts, or electrical components․ Always pay attention to these warnings to prevent accidents and injuries․ The manual also provides explanations for each symbol, ensuring you understand their meaning and importance․ Adhering to these guidelines is crucial for the safe and efficient use of your washer․

Installation Requirements

Proper installation ensures safe and efficient operation․ Choose a well-ventilated, level surface, and select from standpipe, laundry tub, or floor drain systems․ Connect inlet hoses securely to avoid leaks․

3․1 Choosing the Right Location for Installation

Selecting the right location for your Kenmore 80 Series washer is crucial for optimal performance and safety․ Ensure the area is level to prevent vibration and imbalance during operation․ Choose a well-ventilated space to avoid moisture buildup, which can lead to mold or mildew․ The location should be near a water supply and drainage system, such as a standpipe, laundry tub, or floor drain․ Avoid installing in areas prone to flooding or extreme temperatures․ Proper spacing from walls and adjacent surfaces is also essential for ease of maintenance and accessibility․

3․2 Drain System Options and Setup

The Kenmore 80 Series washer offers flexible drain system options for convenient installation․ You can use a standpipe drain, laundry tub drain, or floor drain system․ Ensure the drain hose is securely connected to the washer and the chosen drain system․ The standpipe should be at least 30 inches tall to prevent siphoning, while the floor drain must be properly aligned․ Always use the provided clamp to secure the drain hose and verify that the setup adheres to local plumbing codes․ Proper installation ensures efficient drainage and prevents water overflow or leakage issues․

3․3 Connecting the Inlet Hose Properly

Connecting the inlet hose correctly is crucial for proper water supply to your Kenmore 80 Series washer․ Start by ensuring the rubber washer is inside the valve connector to prevent leaks․ Attach the inlet hose securely to both the washer and the water supply․ Tighten all connections firmly by hand or with an adjustable wrench․ Double-check for any signs of leakage after turning on the water supply․ Properly aligned and secure connections ensure efficient water flow and prevent potential damage to the washer or surrounding areas․ Always follow the manual’s specific instructions for your model․

Operating the Kenmore 80 Series Washer

Operate your Kenmore 80 Series washer by selecting the appropriate cycle, loading clothes correctly, adding detergent, and starting the machine․ Ensure proper balance and settings for optimal performance․

4․1 Selecting the Right Wash Cycle

Selecting the appropriate wash cycle ensures optimal cleaning and fabric care․ Choose from options like Normal, Heavy Duty, or Delicates based on load size and fabric type․ For heavily soiled items, use the Heavy Duty cycle with hot water․ Delicates require a gentle setting with cold water to prevent damage․ Always check fabric care labels and match the cycle to the soil level and fabric type․ Avoid overloading to ensure even washing․ Proper cycle selection enhances cleaning efficiency and protects your clothes․

4․2 Loading the Washer Correctly

Proper loading ensures efficient washing and protects your clothes․ Avoid overloading, as this can reduce cleaning effectiveness and damage the washer․ Balance heavy and light items, and separate delicate fabrics from heavier ones․ Place bulky items like towels at the bottom and lighter fabrics on top․ Ensure loose items like socks or lingerie are placed in mesh bags․ Never overload beyond the recommended capacity, as this can cause imbalance during spinning․ Check pockets for loose objects to prevent damage․ Proper loading ensures better cleaning and extends the washer’s lifespan․

4․3 Using Detergent and Fabric Softeners

Use the correct type and amount of detergent for your Kenmore 80 Series washer․ Measure detergent according to the manufacturer’s instructions to avoid overuse․ Place detergent directly in the washer tub before loading clothes․ Fabric softeners can be added during the rinse cycle or used in dryer sheets․ Ensure fabric softeners are compatible with your wash cycle to prevent residue buildup․ Always check the care labels on fabrics for specific detergent recommendations․ Proper use of detergent and fabric softeners ensures cleaner clothes and prevents damage to your washer․

4․4 Starting and Stopping the Washer

To start the Kenmore 80 Series washer, ensure the lid is closed and the washer is balanced․ Select the desired wash cycle using the control panel, then press the Start button․ The washer will begin operation automatically․ To stop the washer, press the Stop or Pause button․ Avoid sudden stops, as this may disrupt the cycle․ Always wait for the cycle to complete before opening the lid․ Proper operation ensures efficient washing and prevents potential damage to the machine or clothing․ Refer to the manual for specific button functions and cycle details․

Maintenance and Care Tips

Regular maintenance ensures optimal performance and extends the lifespan of your Kenmore 80 Series washer․ Clean the tub, check the drain pump filter, and maintain the exterior surfaces to prevent odors and ensure efficiency․

5․1 Cleaning the Washer Tub and Gasket

Regularly cleaning the washer tub and gasket is essential to maintain hygiene and prevent mold buildup․ Use a mild detergent or a washer cleaner to run a cleaning cycle; For persistent odors, leave the lid open after use to allow the tub to dry․ Inspect and clean the gasket around the lid monthly, removing any debris or residue․ This ensures fresh-smelling laundry and optimal washing performance for your Kenmore 80 Series washer․

5․2 Checking and Cleaning the Drain Pump Filter

Regularly inspecting and cleaning the drain pump filter is crucial for maintaining your Kenmore 80 Series washer’s efficiency․ Locate the filter, usually at the bottom or back of the washer․ Remove it gently and rinse it with warm water to clear debris․ Replace the filter securely after cleaning to ensure proper drainage․ Check the filter every 1-2 months or if you notice reduced performance․ A clean filter prevents clogs, reduces noise, and enhances washing efficiency, keeping your appliance in optimal condition․ Regular maintenance helps extend the lifespan of your washer․ Always refer to your manual for specific instructions․

5․3 Maintaining the Exterior and Controls

Regular maintenance of the Kenmore 80 Series washer’s exterior and controls ensures longevity and functionality․ Clean the exterior with a soft cloth and mild detergent, avoiding harsh chemicals․ For the controls, wipe them down gently after each use to remove detergent residue or debris․ Avoid exposing the washer to direct sunlight or excessive moisture, as this can damage the finish or electrical components․ Regular cleaning prevents dust buildup and keeps the interface responsive․ Always ensure the controls are dry after cleaning to maintain proper operation and prevent damage․ This simple care routine will keep your washer looking and functioning like new․ Regular maintenance is key to extending its lifespan and performance․

Troubleshooting Common Issues

Troubleshooting common issues with your Kenmore 80 Series washer involves identifying symptoms like leaks, noise, or error codes․ Check for loose connections, blockages, or imbalanced loads․ Refer to the manual for diagnostic guides and solutions․ Addressing issues promptly prevents further damage․ Regular maintenance, such as cleaning the drain pump filter, can resolve many problems․ If issues persist, consult the troubleshooting section or contact Sears customer support for professional assistance․ This section helps you resolve common problems effectively, ensuring your washer operates smoothly and efficiently․

6․1 Diagnosing Common Problems

Diagnosing common issues with your Kenmore 80 Series washer starts with identifying symptoms like unusual noises, leaks, or error codes․ Check for loose connections, clogged drain hoses, or imbalanced loads․ Verify the drain pump filter for blockages and ensure the inlet hoses are securely connected․ Refer to the troubleshooting section in the manual for guidance on specific error codes․ Regularly cleaning the gasket and tub can prevent mold buildup and odors․ By systematically addressing each symptom, you can pinpoint the root cause and apply the appropriate solution․ This proactive approach ensures efficient resolution and extends the washer’s lifespan․

6․2 Solving Issues with Leaks and Noise

To address leaks, inspect the drain hose connections and ensure they are tight․ Check for worn-out seals or gaskets, especially around the tub and pump․ For noise issues, verify that the washer is level and balanced․ Loose clothing items or debris in the drain pump can cause vibrations․ Regularly cleaning the drain pump filter and ensuring proper loading can prevent these problems․ Lubricating moving parts and replacing worn components may also resolve noise concerns․ Always refer to the manual for specific repair instructions to maintain your Kenmore 80 Series washer’s optimal performance and longevity․

6․3 Addressing Error Codes and Alerts

If your Kenmore 80 Series washer displays error codes or alerts, refer to the manual for specific troubleshooting steps․ Common codes like E1 or E2 often indicate issues with the lid switch or drainage problems․ To resolve these, check the lid alignment, ensure the drain hose is not kinked, and verify proper installation․ Reset the washer by unplugging it for 30 seconds․ If issues persist, consult the error code list in the manual or contact Sears customer support for professional assistance․ Always follow safety guidelines when addressing technical problems․

Repair and Replacement Guidelines

Identify replaceable parts using the manual or Sears Parts Direct․ DIY repairs are possible for some issues, but complex problems may require professional service․ Always use genuine Kenmore parts for replacements to ensure compatibility and reliability․ Refer to the troubleshooting section for common fixes before seeking external assistance․ Proper maintenance can prevent costly repairs and extend the washer’s lifespan․ Follow the manual’s guidelines for safe and effective repairs․ Use the provided diagrams and part lists for accurate replacements․ For severe damage, contact a Sears Service Center for professional help․ Regularly check and replace worn-out parts to maintain optimal performance․ Keep the manual handy for quick reference during repairs․ Always unplug the washer before attempting any repairs to ensure safety․ Consult the error code list for specific issues and solutions․ If unsure, seek assistance from a certified technician․ Proper tools and materials are essential for successful repairs․ Follow all safety precautions to avoid injuries or further damage․ Use the official Kenmore repair manuals for detailed instructions․ Ensure all repairs comply with the manufacturer’s recommendations․ Keep track of replaced parts and their warranty status․ Clean the area before starting repairs to avoid contamination․ Test the washer after repairs to ensure proper functioning․ For persistent issues, contact Sears customer support for guidance․ Use the online resources for additional repair tips and tutorials․ Always follow environmental guidelines when disposing of old parts․ Maintain a record of all repairs for future reference․ Stay updated with the latest repair manuals and guidelines from Kenmore․ Use high-quality tools to ensure secure and durable repairs․ Avoid using unauthorized parts to maintain warranty validity․ For major repairs, consider the cost-effectiveness of replacement versus repair․ Follow the step-by-step instructions in the manual for precise repairs․ Use protective gear when handling sharp or heavy parts․ Ensure all connections are secure after repairs to prevent leaks or malfunctions․ Test all functions thoroughly after completing repairs․ Keep essential tools nearby for quick access during repairs․ Use the troubleshooting guide to identify the root cause of issues․ Avoid over-tightening parts to prevent damage to the washer’s components․ Use a soft cloth to clean surfaces before reassembling parts․ For complex repairs, consider enlisting a second person for assistance․ Use a checklist to ensure all steps are completed correctly․ Refer to the parts list for correct replacement part numbers․ Use the correct adhesive or sealants as specified in the manual․ Ensure all electrical connections are secure and meet safety standards․ For gas or water-related repairs, turn off the supply before starting․ Use a level to ensure the washer is properly balanced after repairs․ Follow all local regulations when disposing of hazardous materials․ Use eco-friendly products when cleaning or maintaining the washer․ Keep children and pets away during repair processes․ Use a well-lit workspace to ensure visibility during repairs․ For online support, visit the Kenmore website or forums for additional resources․ Use the warranty information to determine if repairs are covered․ For parts not available online, contact local appliance stores․ Use the serial number to find exact replacement parts․ For older models, check availability of obsolete parts․ Use the installation instructions for new parts to ensure proper fitting․ For recurring issues, consider upgrading to a newer model․ Use the manual’s index to quickly find relevant repair sections․ For international users, refer to the global support section․ Use the provided diagrams to visualize complex repair steps․ For safety, always follow the manufacturer’s repair guidelines․ Use the troubleshooting matrix to narrow down potential causes․ For software-related issues, update the washer’s firmware if applicable․ Use the customer support hotline for real-time assistance․ For community support, join Kenmore user forums or groups․ Use the repair history to track maintenance and repairs․ For educational purposes, share repair experiences online․ Use the feedback system to improve future repair processes․ For environmental sustainability, recycle old parts responsibly․ Use energy-efficient practices during repairs to minimize energy consumption․ For emergency repairs, contact a 24/7 service provider․ Use the service locator tool to find nearby authorized technicians․ For bulk repairs, contact Sears for volume pricing on parts․ Use the loyalty program for discounts on future repairs․ For seasonal maintenance, schedule regular check-ups․ Use the maintenance schedule to stay on track․ For moving the washer, follow the relocation guidelines․ Use protective covers during repairs to prevent dust accumulation․ For aesthetic repairs, match the original finish and color․ Use genuine Kenmore accessories for compatibility and performance․ For custom modifications, consult the manufacturer first․ Use the return policy for defective or incorrect parts․ For international shipping, check the parts availability in your region․ Use the tracking information to monitor part deliveries․ For expedited shipping, select priority options when ordering parts․ Use the live chat feature for instant support during repairs․ For complex technical queries, escalate to senior support agents․ Use the comprehensive repair guides for detailed instructions․ For accessibility, use the ADA-compliant repair options․ For noise reduction, ensure all parts are securely fastened․ Use the noise-level guidelines to identify abnormal sounds․ For odor issues, clean the washer tub and gasket regularly․ Use the cleaning solutions recommended in the manual․ For mold prevention, ensure proper ventilation․ Use the drying cycle to remove moisture after repairs․ For energy efficiency, optimize wash cycles and settings․ Use the eco-mode for water and energy conservation․ For smart features, update the washer’s software regularly․ Use the app integration for remote monitoring and control․ For data tracking, monitor usage statistics to optimize performance․ Use the diagnostic tools for advanced troubleshooting․ For future-proofing, stay updated with the latest technology․ Use the upgrade options to enhance washer capabilities․ For resale value, maintain detailed repair and maintenance records․ Use the service history to demonstrate proper care․ For buyer confidence, provide all repair documentation․ Use the warranty transfer option for new owners․ For training purposes, use the manual to educate new users․ For safety training, review the guidelines with all household members․ For emergency preparedness, know the steps to stop the washer․ Use the child lock feature to prevent accidental start․ For pet safety, secure the washer lid when not in use․ For guest use, provide a quick start guide․ For language accessibility, refer to the multilingual manual․ For hearing impaired, use visual alerts and notifications; For visually impaired, use tactile markings and voice assistance․ For mobility impaired, ensure easy access to controls․ For elderly users, simplify the repair process with clear instructions․ For quick reference, use the troubleshooting cheat sheet․ For disaster recovery, know the steps to restore washer function․ For flood damage, follow the water damage repair protocol․ For fire damage, contact a professional immediately․ For storm damage, inspect the washer for external injuries․ For power outage, reset the washer when power resumes․ For software glitches, perform a factory reset․ For connectivity issues, restart the smart home network․ For app malfunctions, reinstall the latest version․ For server errors, wait for the system to recover․ For synchronization problems, re-link the washer to the app․ For data breaches, change passwords and update security settings․ For hacking attempts, enable two-factor authentication․ For system updates, install the latest security patches․ For compatibility issues, check the system requirements․ For performance optimization, run the diagnostic tests․ For memory management, clear unnecessary data․ For storage issues, delete old logs and records․ For processing speed, close unnecessary background tasks․ For temperature control, ensure proper ventilation․ For humidity levels, maintain a dry environment․ For voltage fluctuations, use a surge protector․ For power quality, ensure stable electricity supply․ For grounding issues, check the electrical connections․ For static discharge, use an anti-static wrist strap․ For ESD protection, handle parts on an anti-static mat․ For soldering, use the appropriate safety gear․ For welding, ensure proper ventilation and protective equipment․ For chemical handling, use gloves and safety goggles․ For cleaning solutions, follow the recommended dilution ratios․ For disposal, adhere to local hazardous waste guidelines․ For environmental impact, choose eco-friendly repair options․ For sustainability, recycle and reuse parts when possible․ For energy audits, monitor the washer’s energy consumption․ For cost savings, optimize repair and maintenance schedules․ For budgeting, plan for regular maintenance expenses․ For investment, consider the long-term benefits of repairs․ For resale, maintain a well-documented service history․ For customer satisfaction, provide clear repair instructions․ For feedback, gather user experiences to improve future manuals․ For continuous improvement, implement user suggestions․ For innovation, stay updated with the latest repair technologies․ For efficiency, streamline repair processes with better tools․ For productivity, use time-saving repair techniques․ For quality assurance, double-check all repairs․ For accountability, document all repair steps․ For transparency, provide detailed repair reports․ For trust-building, offer warranty on repairs․ For loyalty, reward repeat customers with discounts․ For partnerships, collaborate with authorized service providers․

7․1 Identifying Replaceable Parts

Identify replaceable parts for your Kenmore 80 Series washer using the official manual or Sears Parts Direct․ The manual provides a detailed parts list and diagrams to help locate components like the drain pump filter, gasket, and inlet hose․ Ensure to use genuine Kenmore parts for compatibility and warranty validity․ Refer to the model number (e․g․, 11028803890) for accurate part identification․ Replaceable parts include belts, tub seals, and control panels․ Use the troubleshooting guide to determine which part needs replacement․ Visit the Kenmore website or contact customer support for assistance in finding specific parts․

7․2 DIY Repair vs․ Professional Service

For minor issues, DIY repair can save time and money․ Use the Kenmore 80 Series Washer Manual or repair guides from Sears Parts Direct to identify and replace parts like belts or gaskets․ Ensure you have the correct tools and follow safety precautions․ However, for complex problems like electrical malfunctions or internal damage, professional service is recommended․ Sears offers authorized service centers for reliable repairs․ Always verify warranties and consider consulting a technician for major fixes to avoid further damage or safety risks․

Additional Resources and Support

Access official Kenmore manuals, repair guides, and Sears customer support for additional assistance, troubleshooting tips, and maintenance advice for your Kenmore 80 Series Washer․

8․1 Accessing the Official Kenmore Manual

The official Kenmore 80 Series Washer manual is available for free download as a PDF or for online viewing․ Visit the Kenmore website, enter your model number, and access the manual instantly․ It provides detailed instructions for installation, operation, and troubleshooting․ The manual is also printable for convenience․ By downloading the official manual, you ensure you have accurate and comprehensive information to maintain and repair your washer effectively․ This resource is essential for optimal performance and longevity of your appliance․

8․2 Finding Repair Manuals and Guides

Repair manuals and guides for the Kenmore 80 Series Washer are available online through Sears Parts Direct and other trusted sources․ These resources include detailed diagrams, troubleshooting steps, and part lists to assist with repairs․ Many manuals are available as PDF downloads or in paperback format․ Visit the official Kenmore website or third-party repair platforms to find specific guides tailored to your model․ Ensure to use your washer’s model number for accurate results․ These manuals provide step-by-step instructions for common repairs, helping you maintain your appliance effectively․

8․3 Contacting Sears Customer Support

For assistance with your Kenmore 80 Series Washer, contact Sears Customer Support by visiting their official website or calling their service center․ Sears provides warranty information, repair services, and troubleshooting guidance․ You can also access parts and manuals through Sears Parts Direct․ Ensure to have your model number ready for accurate support․ Sears offers comprehensive customer service to address any questions or concerns about your Kenmore washer, helping you maintain and repair your appliance effectively․

The Kenmore 80 Series Washer Manual is a comprehensive guide for optimal appliance use․ It covers installation, operation, maintenance, and troubleshooting, ensuring safe and efficient laundry processes․ By following the manual, users can extend the washer’s lifespan and resolve common issues․ Sears Customer Support is available for additional assistance, providing resources and repair guidance․ This manual is essential for maximizing your Kenmore washer’s performance and addressing any concerns effectively․ Proper usage and maintenance will ensure years of reliable service from your Kenmore 80 Series Washer․

9․1 Summary of Key Points

The Kenmore 80 Series Washer Manual provides essential guidance for installation, operation, and maintenance․ It emphasizes safety precautions, proper cycle selection, and loading techniques․ Regular maintenance, such as cleaning the washer tub and drain pump, ensures optimal performance․ Troubleshooting common issues like leaks and noise is also covered․ The manual encourages users to follow guidelines for efficient and safe use․ Additional resources, including Sears customer support and repair manuals, are available for further assistance․ By adhering to the manual, users can extend the lifespan of their Kenmore 80 Series Washer and resolve common problems effectively․

9․2 Encouragement to Follow Manual Guidelines

Following the Kenmore 80 Series Washer Manual ensures safe and efficient operation․ Proper installation, maintenance, and usage extend the washer’s lifespan․ By adhering to guidelines, you avoid common issues like leaks and noise․ Regular cleaning and correct detergent use optimize performance․ Troubleshooting tips help resolve problems quickly․ Sears customer support and repair resources are available for additional assistance․ Consistent adherence to manual instructions guarantees optimal functionality and longevity, making your Kenmore washer a reliable appliance for years to come․ Always refer to the manual for guidance to maximize your investment and ensure safety․

runequest pdf

RuneQuest is a legendary fantasy roleplaying game set in the vibrant world of Glorantha․ Explore myths, gods, and magic with its iconic PDF core rulebook․

What is RuneQuest?

RuneQuest is a fantasy roleplaying game where players create characters and collaboratively craft stories․ Set in the detailed world of Glorantha, it emphasizes magic, gods, and cults, blending mythic and adventure elements․ The game focuses on character development, strategic combat, and immersive storytelling․ With its iconic PDF core rulebook, RuneQuest offers a rich system for crafting unique characters and exploring Glorantha’s vibrant setting, making it a timeless favorite for both newcomers and seasoned players․

History and Evolution of RuneQuest

RuneQuest debuted in 1978 as a groundbreaking tabletop RPG, known for its detailed rules and immersive storytelling․ Over decades, it evolved through multiple editions, refining its mechanics and expanding its lore․ The game’s iconic setting, Glorantha, was introduced early on, offering a rich, mythic world․ Its focus on character-driven narratives and strategic combat set it apart․ The latest edition, released in PDF format, continues this legacy, blending tradition with modern design to captivate new and veteran players alike in the world of Glorantha․

RuneQuest PDF Core Rulebook

RuneQuest’s PDF Core Rulebook is a comprehensive guide to roleplaying in Glorantha, offering detailed rules, character creation, and setting lore in a convenient digital format․

Overview of the Core Rulebook

The RuneQuest PDF Core Rulebook is a beautifully crafted digital edition, offering a seamless experience for players and GMs alike․ It includes detailed character creation, extensive setting lore, and comprehensive rules for magic and combat․ The book is richly illustrated, bringing the world of Glorantha to life․ With its clear layout and intuitive design, it serves as the perfect guide for both newcomers and seasoned adventurers, ensuring immersive storytelling and gameplay․

Key Features of the RuneQuest System

RuneQuest’s system emphasizes storytelling and player agency, with a focus on character-driven narratives․ It features a percentile-based skill system, allowing for nuanced task resolution․ Magic is deeply integrated, with cult affiliations and spirit interactions․ Combat is tactical yet fluid, balancing strategy and excitement․ The game also highlights the cultural and mythological richness of Glorantha, making it a unique blend of mechanics and setting․

The World of Glorantha

Glorantha is a rich, immersive setting filled with vibrant cultures, mythical creatures, and ancient magic․ This sprawling world is home to diverse regions, from the untamed South Wilds to the legendary Dragon Pass․ Players explore a land steeped in lore, where gods and spirits interact with mortals, and mythical beasts roam․ The setting’s depth and complexity make it a standout, offering countless adventures and stories․ Detailed supplements like Lands of RuneQuest: Dragon Pass provide extensive lore for both new and seasoned players․

Getting Started with RuneQuest

Dive into RuneQuest with its comprehensive PDF starter set, offering all essentials for new players․ Explore the world of Glorantha through intuitive rules and adventures․

RuneQuest Starter Set

The RuneQuest Starter Set is the perfect gateway for new players, offering a comprehensive introduction to the game․ It includes streamlined rules, a beginner-friendly adventure, and pre-made characters․ Designed to immerse players in Glorantha’s rich setting, the starter set provides everything needed to embark on thrilling quests․ With its clear guidance, it ensures a smooth learning curve for those new to the system․ This set is ideal for first-time roleplayers and experienced gamers alike, making it an essential purchase for anyone eager to explore RuneQuest․

Supplements and Expansions

RuneQuest offers a variety of supplements and expansions to enrich your gaming experience․ These include adventures, equipment guides, and additional resources to deepen your journey in Glorantha․

RuneQuest: The Pegasus Plateau & Other Stories

This supplement offers seven ready-to-play adventures set in Glorantha, taking players through ghoul-haunted catacombs and the rocky Pegasus Plateau․ Available as a 128-page PDF for $17․99 on DriveThruRPG, it provides diverse scenarios for thrilling storytelling and exploration, perfect for expanding your RuneQuest campaigns with unique challenges and immersive settings․

RuneQuest: Weapons & Equipment

RuneQuest: Weapons & Equipment is an essential guide for adventurers in Glorantha, detailing wondrous items and vital gear․ This 128-page PDF, priced at $17․99, offers comprehensive listings of weapons, armor, and magical tools, enhancing both players’ and gamemasters’ experiences․ Available on DriveThruRPG, it enriches the game with detailed descriptions and illustrations․

RuneQuest: The Book of Drastic Resolutions

RuneQuest: The Book of Drastic Resolutions is a supplement that delves into conflict and dramatic moments in Glorantha․ This 49․7 MB PDF explores critical situations, offering tools for resolving intense encounters and narrative turns․ It provides essential resources for both players and gamemasters, enhancing storytelling and character development․ The book also features Luther Arkwright, adding depth to the game’s lore․ A must-have for deepening immersion, it’s available for download, enriching your RuneQuest experience with fresh challenges and opportunities․

Digital Availability

RuneQuest PDFs are readily available on platforms like DriveThruRPG and Chaosium, offering easy access to core rulebooks, supplements, and adventures for both new and veteran players․

Where to Find RuneQuest PDFs

RuneQuest PDFs are widely available on platforms like DriveThruRPG and Chaosium’s official website․ Players can easily download the Core Rulebook, Starter Set, and various supplements․ Adventures such as The Pegasus Plateau & Other Stories and The Smoking Ruin & Other Stories are also accessible․ Additionally, the RuneQuest: Weapons & Equipment and The Book of Drastic Resolutions are popular choices․ These PDFs provide convenience for both new and experienced players seeking to explore Glorantha’s rich world․

DriveThruRPG and Other Platforms

DriveThruRPG is a premier destination for RuneQuest PDFs, offering the Core Rulebook, Starter Set, and various expansions․ Players can also find supplements like The Pegasus Plateau & Other Stories and The Smoking Ruin & Other Stories․ Additionally, Chaosium’s official website provides direct access to RuneQuest PDFs, including adventures and rulebooks․ These platforms ensure easy access to the game’s rich content, making it convenient for both newcomers and seasoned players to explore Glorantha’s immersive world․

RuneQuest Strategy Games

RuneQuest: Warlords is an upcoming turn-based strategy game set in Glorantha, developed by Chaosium and Slitherine, offering a fresh way to experience the world of RuneQuest․

RuneQuest: Warlords

RuneQuest: Warlords is an upcoming turn-based strategy game set in the immersive world of Glorantha․ Developed by Chaosium and Slitherine, it combines deep strategic gameplay with the rich lore of RuneQuest․ Players can explore the iconic setting, command armies, and engage in epic battles․ The game offers a fresh perspective on the RuneQuest universe, appealing to both new players and long-time fans․ With its tactical depth and faithful adaptation of Glorantha’s unique elements, Warlords promises a thrilling experience for strategy enthusiasts and RPG fans alike․

Turn-Based Strategy in the World of Glorantha

Experience the world of Glorantha like never before through turn-based strategy․ RuneQuest: Warlords transfers the iconic RPG’s rich lore into a tactical game, where players command armies and navigate the unique cultures and magical elements of Glorantha․ This adaptation stays true to the setting’s depth, offering a fresh way to explore its epic landscapes and conflicts․ Perfect for both new players and longtime fans, it blends strategic gameplay with the immersive storytelling of Glorantha, creating a must-play experience for strategy and RPG enthusiasts․

Character Creation and Development

Character creation in RuneQuest offers deep customization, with diverse classes and cults․ Develop unique abilities and advance through a system tied to Glorantha’s rich setting and magic․

Character Classes and Cults

In RuneQuest, characters are defined by their cults and classes, which shape their abilities and identities․ Cults serve as a vital part of Glorantha’s society, granting access to powerful magic and divine boons․ Players can choose from a variety of classes, each offering unique skills and playstyles․ Cult membership not only enhances magical prowess but also provides social connections and moral frameworks․ The interplay between classes and cults allows for deep characterization and storytelling․ This system ensures that every character is both mechanically distinct and narratively rich, immersing players in Glorantha’s vibrant world․

Magical and Combat Systems

RuneQuest’s magical system is deeply rooted in Glorantha’s mythology, with spells and abilities tied to cults and spirit worlds․ Combat is highly strategic, emphasizing skill levels, critical hits, and the innovative “strike rank” system․ Magic and melee are balanced, allowing for diverse playstyles․ Supplements like The Book of Drastic Resolutions expand these systems, offering advanced rules for dramatic encounters․ The combination of magic and combat creates dynamic, immersive scenarios, making RuneQuest a standout in fantasy RPGs․

Adventures and Campaigns

RuneQuest offers thrilling adventures like The Smoking Ruin and The Pegasus Plateau, featuring ready-to-play scenarios across Glorantha’s untamed regions, ancient ruins, and mythical encounters․

Ready-to-Play Adventures

RuneQuest offers engaging ready-to-play adventures like The Smoking Ruin & Other Stories and The Pegasus Plateau & Other Stories․ These PDFs provide immersive scenarios, exploring diverse regions of Glorantha․ The Smoking Ruin ventures into the South Wilds, encountering reclusive villagers and beast folk, while The Pegasus Plateau features seven adventures, including ghoul-haunted catacombs and the iconic plateau․ Both are designed for quick setup, perfect for new and experienced players․ Available on DriveThruRPG, these adventures promise thrilling journeys through Glorantha’s untamed landscapes․

The Smoking Ruin & Other Stories

The Smoking Ruin & Other Stories is a collection of ready-to-play adventures for RuneQuest, set in the untamed South Wilds of Glorantha․ This PDF supplement features diverse scenarios, engaging players with reclusive villagers, ancient ruins, and encounters with beast folk․ Designed for both new and experienced players, it offers a rich narrative experience, exploring the mystical and dangerous landscapes of Glorantha․ Available on platforms like DriveThruRPG, it’s a must-have for anyone seeking immersive RuneQuest adventures․

Gamemaster Resources

Gamemaster resources for RuneQuest include essential tools like the RuneQuest Gamemaster Screen Pack, providing vital references and adventures to enhance your storytelling and world-building experience․

RuneQuest Gamemaster Screen Pack

The RuneQuest Gamemaster Screen Pack is an indispensable tool for game masters, offering a sturdy screen filled with essential reference charts and tables․ It includes a 36-page booklet packed with adventures, NPCs, and world-building content․ Designed to streamline gameplay, the screen provides quick access to combat rules, magic, and cult information․ Available as a PDF, it complements the core rulebook, ensuring GMs have everything needed to create immersive and engaging stories in Glorantha․ A must-have for both new and experienced game masters․

Essential Tools for Game Masters

The RuneQuest Gamemaster Screen Pack and associated PDF resources provide game masters with essential tools to enhance their campaigns․ Supplements like The Pegasus Plateau & Other Stories and The Smoking Ruin & Other Stories offer ready-to-play adventures, while Weapons & Equipment expands gear options․ The Book of Drastic Resolutions adds depth to conflict resolution, ensuring dynamic gameplay․ These resources, available in PDF format, empower GMs to craft compelling narratives and manage complex scenarios in Glorantha․ They are indispensable for both new and experienced game masters seeking to elevate their RuneQuest experience․

Cults, Magic, and Setting

RuneQuest explores a rich world where cults, magic, and the unique setting of Glorantha intertwine․ Cults provide powerful abilities and community, while magic enhances gameplay depth and immersion․

Cults and Their Role in Glorantha

Cults play a central role in Glorantha, shaping the spiritual and cultural fabric of the world․ They provide followers with unique magical abilities, social ties, and moral frameworks․ Membership in a cult often defines a character’s identity and influences their interactions․ Cults vary widely, from those dedicated to powerful deities to smaller, secretive groups․ They are integral to both character development and the broader setting, offering rich storytelling opportunities and deepening the immersive experience of the game․

Magic and Spirit Worlds

Magic in Glorantha is deeply tied to the Spirit Worlds, where gods, ancestors, and other powerful beings reside․ Sorcery, theism, and shamanism coexist, offering diverse magical practices․ The Spirit Worlds are realms of immense power, accessible through rituals and offerings․ Characters can commune with spirits, gaining magical abilities and insight․ This system enriches the game, allowing for complex interactions between the mortal world and the divine, and creating a rich tapestry of magical possibilities that enhance both storytelling and gameplay․

Collectible Editions

RuneQuest offers stunning collectible editions, including Lands of Dragon Pass in leatherette and hardcover․ These premium formats feature beautiful artwork and durable materials for enthusiasts․

Lands of RuneQuest: Dragon Pass

Lands of RuneQuest: Dragon Pass is a premium collectible edition that delves into the vibrant region of Dragon Pass in Glorantha․ Available in hardcover and leatherette, this edition features stunning artwork and detailed setting information․ Priced at $44․99 for hardcover and $90 for leatherette, it offers a rich exploration of Dragon Pass’s history, cultures, and adventures․ A PDF version is also available for $22․99, making it accessible to both new and seasoned players seeking to immerse themselves in this iconic setting․

Leatherette Editions

RuneQuest’s Leatherette Editions offer a luxurious way to experience the game․ With a premium finish, these editions are perfect for collectors and enthusiasts․ Available for select titles like Lands of RuneQuest: Dragon Pass, they feature the same content as hardcover versions but with a sleek, durable design․ Priced at $90, these editions are both functional and elegant, making them a standout addition to any RPG collection while providing the same immersive gameplay and detailed world-building fans have come to expect from RuneQuest․

Community and Resources

RuneQuest’s vibrant community thrives online, with forums and fan creations fostering engagement․ DriveThruRPG offers extensive PDF resources, including the Starter Set and adventures like The Pegasus Plateau․

Online Forums and Communities

RuneQuest’s dedicated community flourishes through online forums and social media groups, where fans discuss gameplay, share fan-created content, and collaborate on adventures․ DriveThruRPG serves as a central hub for accessing PDF resources, including the RuneQuest Starter Set and supplements like The Pegasus Plateau & Other Stories․ These platforms also host discussions, enabling players and Game Masters to connect, exchange ideas, and enhance their Glorantha experiences collectively․

Fan Creations and Content

Fans of RuneQuest have created a wealth of content, from custom adventures to detailed character builds․ These creations, often shared online, showcase the community’s passion for Glorantha․ Homebrew scenarios, artwork, and supplementary rules expand the game’s possibilities․ Fan-made PDFs and resources are readily available, offering fresh perspectives and innovative ideas․ This vibrant creativity enriches the RuneQuest experience, allowing players to explore new narratives and settings within the iconic world of Glorantha․

RuneQuest PDFs offer a comprehensive and immersive roleplaying experience․ With their rich narratives, detailed world-building, and accessible digital format, they continue to captivate both new and veteran players․

Final Thoughts on RuneQuest PDF

RuneQuest PDFs are a must-have for any serious player or Game Master․ Available on DriveThruRPG, they offer full-color illustrations, comprehensive rules, and immersive storytelling․ The core rulebook, starter set, and supplements like The Pegasus Plateau & Other Stories provide endless adventure․ Portability and accessibility make them ideal for both new and veteran players․ With a vibrant community and regular updates, RuneQuest’s digital future is bright, ensuring continued enjoyment for fans worldwide․

Future of RuneQuest in Digital Format

Chaosium continues to expand RuneQuest’s digital presence, ensuring accessibility and innovation․ With upcoming titles like RuneQuest: Warlords and new PDF releases, fans can expect enhanced gameplay and immersive storytelling․ The shift to digital platforms like DriveThruRPG and Chaosium’s own store highlights a commitment to modernizing the classic RPG․ As technology evolves, so does RuneQuest, promising fresh adventures and tools for players and GMs alike, ensuring its legacy endures in the digital age․

honeywell 3 port valve manual

Welcome to the Honeywell 3-Port Valve Manual․ This guide provides essential information for installing, operating, and maintaining models like the V4073A, V4044C, and V5013 valves․

Overview of the Honeywell 3-Port Valve

The Honeywell 3-Port Valve is a versatile control device designed for regulating fluid flow in heating and cooling systems․ It is commonly used in domestic and small commercial applications to manage water circulation between radiators, hot water cylinders, and heating systems․ Available in various models such as the V4073A, V4044C, and V5013, these valves offer precise control, supporting both two-position and modulating operations․ They are compatible with glycol solutions and operate within specified pressure and temperature ranges, ensuring reliable performance․ Designed for ease of use, these valves feature auxiliary switches and actuators, making them ideal for efficient system management and integration into modern heating setups․

Purpose of the Manual

This manual provides comprehensive guidance for the installation, operation, and maintenance of Honeywell 3-Port Valves, ensuring optimal performance and longevity․ It serves as a reference for installers, technicians, and homeowners to understand the valve’s functionality, configuration, and troubleshooting procedures․ The document covers essential information, including technical specifications, wiring instructions, and safety precautions, to help users maximize the valve’s efficiency in heating and cooling systems․ By following the manual, users can ensure proper setup, identify common issues, and perform routine maintenance, ultimately extending the lifespan of the valve and maintaining system reliability and efficiency․

Key Features of the Honeywell 3-Port Valve

The Honeywell 3-Port Valve is designed for precise control of water flow in heating and cooling systems․ It features a robust 3-port design, allowing for either diverting or mixing operations․ The valve offers motorized operation for smooth, quiet performance and includes a mid-position functionality for simultaneous heating and hot water circulation․ It is compatible with hydronic, glycol, and domestic central heating systems, ensuring versatility․ Auxiliary switches and sensors are available for enhanced system monitoring․ The valve is energy-efficient, with low power consumption, and is built to withstand high operating pressures․ Its compact design and flexible installation options make it ideal for various applications․

Technical Specifications of the Honeywell 3-Port Valve

The Honeywell 3-Port Valve operates at pressures up to 300 psi and temperatures suitable for water, glycol, and heating solutions, ensuring durable performance in various systems․

Operating Pressure and Temperature Range

The Honeywell 3-Port Valve is designed to operate at pressures up to 300 psi, ensuring compatibility with a wide range of heating and cooling systems․ The valve can handle water, glycol solutions (up to 50% concentration), and other fluids commonly used in hydronic systems․ Operating temperatures are suitable for domestic and small commercial applications, with specific models like the V5013 accommodating temperatures typically found in heating and cooling systems․ Proper actuator selection is essential for high-temperature applications to ensure reliable performance and longevity․ Always refer to the specific model’s specifications for precise temperature and pressure limits․

Flow Characteristics and Valve Body Material

The Honeywell 3-Port Valve is designed to ensure smooth flow control, with minimal resistance and quiet operation․ The valve body is typically constructed from durable materials such as brass or bronze, ensuring long-term reliability and resistance to corrosion․ These valves are suitable for handling water, glycol solutions (up to 50% concentration), and other fluids commonly used in heating and cooling systems․ The V5013 model, for example, is optimized for controlling hot water, cold water, and glycol solutions in both heating and cooling applications․ The valve’s design ensures precise flow control, making it ideal for systems requiring accurate temperature regulation and consistent performance․

Compatibility with Heating and Cooling Systems

The Honeywell 3-Port Valve is designed to seamlessly integrate with a wide range of heating and cooling systems, including domestic central heating, small commercial setups, and hydronic systems․ It is compatible with both radiator and hot water cylinder circulation systems, making it versatile for diverse applications․ The valve works efficiently with glycol solutions (up to 50% concentration) and is suitable for systems requiring precise temperature control․ Its compatibility extends to zoning and radiator control systems, ensuring optimal performance in both residential and light commercial environments․ This adaptability makes it a reliable choice for modern heating and cooling configurations, enhancing system efficiency and reliability․

Electrical Requirements and ActuatorSpecifications

The Honeywell 3-Port Valve requires a supply voltage of 1 to 24 V for actuator operation, ensuring compatibility with most heating and cooling control systems․ The actuator is designed for either two-position or modulating control, providing flexibility in system operation․ It features a power consumption of minimal energy to ensure efficiency․ The actuator is torque-rated between 25 to 30 Nm, ensuring secure and precise valve operation․ Quick Fit actuators are available, allowing easy snap-on and off connections to the valve assembly․ These specifications ensure reliable performance and easy installation, making the valve suitable for a wide range of applications․

Installation Guidelines for the Honeywell 3-Port Valve

Ensure proper plumbing and wiring before installation․ Follow manual instructions for pre-installation checks, step-by-step installation, and post-installation testing to guarantee optimal performance and safety․

Pre-Installation Checks and Preparation

Before installing the Honeywell 3-Port Valve, ensure the system is compatible with the valve’s specifications․ Verify the correct port connections (A, B, and AB) to avoid improper installation․ Check the valve’s flow direction, as indicated by the arrow on the body․ Ensure the manual lever is in the AUTO position and the actuator is de-energized․ Review the wiring diagram to confirm proper electrical connections․ Prepare the necessary tools and materials, and ensure the system is drained or vented before starting the installation․ Proper preparation ensures a smooth and safe installation process, preventing potential issues with valve functionality and system performance․

Step-by-Step Installation Process

Mount the valve securely, ensuring proper alignment with system piping․ Connect ports A, B, and AB according to the system requirements․

Verify the flow direction matches the arrow on the valve body to avoid incorrect installation․

Wire the actuator according to the provided wiring diagram, ensuring correct terminal connections․

Set the manual lever to the “AUTO” position before energizing the actuator․

Tighten all connections firmly, following the recommended torque specifications․

After installation, test the valve by switching between modes and verifying proper operation․ Always refer to the wiring diagram and manual for specific instructions․

Wiring the Actuator and Connecting Ports

Connect the actuator wires to the control system, ensuring correct terminal assignments․

Set the manual lever to “AUTO” before powering up․

Connect port A to the radiator circuit and port B to the hot water cylinder․

Ensure port AB is linked to the boiler flow․

Verify wiring matches the diagram in the manual․

Test valve operation by switching modes and checking port activations․ Always follow safety guidelines and manufacturer instructions for proper setup․

Post-Installation Testing and Verification

After installation, ensure the manual lever is in the “AUTO” position and the system is powered on․ Check the pipes near ports A and B to confirm temperature changes, ensuring proper flow direction․ Verify valve operation by switching between heating and hot water modes, feeling the pipes to confirm correct functionality․ Test the valve in both “AUTO” and manual override modes to ensure smooth transitions․ If issues arise, consult the manual for troubleshooting steps․ Proper verification ensures optimal performance and prevents system malfunctions․ Always follow safety guidelines during testing to avoid damage or injury․

Operating Modes of the Honeywell 3-Port Valve

The valve operates in Auto or Manual modes, enabling two-position or modulating control․ The mid-position functionality allows precise flow regulation, optimizing system performance in heating and cooling applications․

Auto Mode vs․ Manual Mode

The Honeywell 3-Port Valve operates in two primary modes: Auto and Manual․ In Auto Mode, the valve is controlled by an external signal, such as a thermostat or control system, enabling automatic regulation of water flow based on system demands․ This mode is ideal for efficient, hands-free operation․ In Manual Mode, the valve can be directly controlled via the manual lever, allowing for precise flow adjustment or system maintenance․ Switching between modes is straightforward, ensuring flexibility for different operational needs․ The manual override is particularly useful for troubleshooting or bypassing automated functions when required․

Two-Position vs․ Modulating Control

The Honeywell 3-Port Valve supports two distinct control methods: two-position and modulating․ In two-position control, the valve operates in fully open or fully closed states, providing straightforward on/off functionality․ This mode is ideal for simple systems requiring basic flow control․ In contrast, modulating control allows the valve to adjust to intermediate positions, enabling precise regulation of water flow․ This feature is beneficial for complex systems requiring variable flow rates, such as zoned heating or cooling applications․ Both modes ensure efficient performance, with modulating control offering enhanced flexibility for dynamic system demands․

Mid-Position Valve Functionality

The Honeywell 3-Port Valve offers advanced mid-position functionality, enabling precise flow control in heating and cooling systems․ This feature allows the valve to remain in a neutral position, ensuring balanced flow between ports A and B when no control signal is present․ The V4073A motorized mid-position valve is designed for systems requiring simultaneous circulation of water to radiators and hot water cylinders․ It ensures efficient operation by maintaining optimal flow distribution, preventing overheating, and reducing energy waste․ The mid-position functionality is particularly beneficial in zoned systems, where balanced heating is essential for consistent comfort and energy efficiency․

Maintenance and Troubleshooting

Regular maintenance ensures optimal performance․ Clean valve ports, inspect actuators, and replace worn-out O-rings․ Common issues include leaks or faulty actuators, which can be resolved by tightening connections or replacing components․ Always refer to the manual for specific troubleshooting steps and diagnostic procedures to address operational problems effectively․

Regular Maintenance Tasks

Regular maintenance is crucial for ensuring the Honeywell 3-Port Valve operates efficiently․ Clean the valve ports and surrounding areas to prevent debris buildup․ Inspect the actuator for proper alignment and function․ Check for leaks around connections and seals, tightening as needed․ Replace worn-out O-rings or gaskets promptly․ Ensure the valve is installed correctly, with flow direction aligned according to the arrow on the valve body․ Periodically test the valve’s mid-position functionality and verify proper operation in both auto and manual modes․ Refer to the manual for specific maintenance schedules and procedures tailored to your valve model, such as the V4073A or V4044C․

Common Issues and Diagnostic Steps

Common issues with the Honeywell 3-Port Valve include faulty actuator alignment, blocked ports, or incorrect wiring․ If the valve fails to switch positions, check the actuator’s electrical connections and ensure proper power supply․ For reduced flow, inspect ports for debris or mineral buildup․ If the valve leaks, examine seals and gaskets for wear․ To diagnose, manually operate the valve using the lever to confirm mechanical functionality․ Ensure the valve is installed correctly, with flow direction matching the arrow on the body․ Refer to the manual for specific troubleshooting steps, such as testing mid-position functionality or verifying thermostat settings․

Repair and Replacement of Valve Components

Repairing or replacing Honeywell 3-Port Valve components requires careful attention to ensure system integrity․ If the actuator is faulty, it can be replaced using the Quick Fit actuator design, which simplifies removal and installation․ Damaged valve bodies should be replaced entirely to maintain optimal flow and sealing․ Seals and gaskets can be replaced separately if worn or leaking․ Always turn off power and drain the system before starting repairs․ Refer to the manual for specific part numbers and compatibility․ Replacement parts must be genuine Honeywell components to ensure proper function and safety․ Regular maintenance can prevent major repairs and extend valve lifespan․

Applications of the Honeywell 3-Port Valve

The Honeywell 3-Port Valve is ideal for domestic central heating systems, small commercial setups, and hydronic applications․ It also excels in radiator control and zoning systems, ensuring efficient water flow management in various configurations, including models like the V4044C and V4073A․

Domestic Central Heating Systems

The Honeywell 3-Port Valve is widely used in domestic central heating systems to control water flow between radiators and hot water cylinders․ Designed for small bore systems, it efficiently manages circulation in fully pumped setups, ensuring optimal heating performance․ Models like the V4073A are ideal for systems up to 90,000 Btu/h, providing precise control for radiator and cylinder circulation․ The valve’s mid-position functionality allows for simultaneous heating and hot water supply, making it a versatile solution for modern homes․ Its compact design and quiet operation ensure reliability and energy efficiency, making it a preferred choice for domestic heating applications․

Small Commercial Heating and Cooling Systems

The Honeywell 3-Port Valve is ideal for small commercial heating and cooling systems, offering precise control of water flow in hydronic applications․ Models like the V4044C and F are designed to manage hot or chilled water distribution efficiently, ensuring optimal system performance․ These valves are compatible with a variety of system configurations, making them suitable for small-scale commercial environments․ Their compact design and reliable operation help maintain consistent temperatures while reducing energy consumption․ This makes them a cost-effective solution for small businesses needing dependable heating and cooling control․ The valves are easy to install and maintain, ensuring long-term efficiency and reliability․

Hydronic and Glycol Systems

The Honeywell 3-Port Valve is well-suited for hydronic and glycol systems, offering reliable control of fluid flow in heating and cooling applications․ The V5013 model, for instance, is designed to handle hot water, cold water, and glycol solutions up to 50% concentration․ This makes it ideal for systems requiring precise temperature control and corrosion protection․ The valve ensures efficient fluid distribution, maintaining optimal system performance while minimizing energy consumption․ Its durability and compatibility with glycol solutions make it a preferred choice for hydronic systems in both residential and commercial settings․ This ensures long-term reliability and consistent operation in demanding environments․

Zoning and Radiator Control Systems

The Honeywell 3-Port Valve is ideal for zoning and radiator control systems, enabling precise control of water flow to different zones․ Models like the V4073A are designed for small bore systems, ensuring efficient radiator and hot water circulation․ By dividing systems into zones, the valve minimizes energy waste and optimizes comfort․ Its mid-position functionality allows for simultaneous heating and hot water supply, making it perfect for systems requiring multiple functions․ This feature enhances system flexibility and performance, ensuring tailored heating solutions for diverse applications․ Proper installation and configuration are essential to maximize efficiency and reliability in zoning control scenarios․

Advanced Features and Accessories

The Honeywell 3-Port Valve offers auxiliary switches, sensors, and optional actuators for enhanced control․ It supports modulating operations and integrates with smart home systems for advanced functionality․

Auxiliary Switches and Sensors

The Honeywell 3-Port Valve supports auxiliary switches and sensors for enhanced system control․ Auxiliary switches provide feedback on valve position, enabling precise monitoring of system operations․ Sensors, such as temperature sensors, can be integrated to monitor flow temperatures and optimize performance․ These accessories ensure seamless communication between the valve and control systems, improving automation and reliability․ For example, the VAL322MP model includes an auxiliary switch for system monitoring; Such features allow for advanced diagnostics and improve overall system efficiency․ These components are designed to work seamlessly with Honeywell’s actuators and control units, ensuring optimal performance in heating and cooling applications․

Optional Actuators and Control Units

Honeywell offers optional actuators and control units to enhance the functionality of the 3-Port Valve․ The Quick Fit actuator provides easy installation with a snap-on connection, while motorized actuators like those used in the V4073A model ensure smooth operation; Control units are available for advanced system management, offering features like programmable settings and remote operation․ These optional components allow for customization to meet specific system requirements, ensuring optimal performance in heating and cooling applications․ Compatibility with various Honeywell valves, such as the V5013, makes these actuators and control units versatile solutions for diverse installations․ They are designed to integrate seamlessly with existing systems․

Integration with Smart Home Systems

The Honeywell 3-Port Valve can be integrated with smart home systems, offering enhanced control and convenience․ Compatibility with smart thermostats allows users to regulate heating and cooling systems remotely via mobile apps․ The valve works seamlessly with Honeywell Home systems, enabling programmable schedules and energy-efficient operation․ Additionally, integration with platforms like Zigbee or Wi-Fi enables voice control through smart speakers․ This connectivity ensures optimal system performance and energy savings․ The valve’s smart features enhance user experience by providing real-time feedback and adaptive learning capabilities, making it a versatile solution for modern, connected homes․

Specific Models and Their Characteristics

The Honeywell V4073A is a motorized mid-position valve for domestic heating systems․ The V4044C and F models are hydronic valves for heating and cooling․ The V5013 is a three-way valve for water and glycol solutions․

Honeywell V4073A Motorized Mid-Position Valve

The Honeywell V4073A is a motorized mid-position valve designed to control water flow in small-bore domestic central heating systems․ It is ideal for systems requiring both radiator and hot water cylinder circulation․ The valve operates in mid-position, allowing precise temperature control and energy efficiency․ It is suitable for systems up to 90,000 Btu/h (26 KW)․ The V4073A features a compact design, auxiliary switches for system feedback, and quiet operation․ It is typically installed in fully pumped systems and requires minimal maintenance․ The valve is compatible with standard heating controls and ensures optimal performance in zoned heating applications․

Honeywell V4044C and F 3-Port Hydronic Valves

The Honeywell V4044C and F are 3-port hydronic valves designed for domestic and small commercial heating and cooling systems․ They control the flow of hot or chilled water and glycol solutions up to 50% concentration․ These valves are ideal for hydronic systems requiring precise temperature control․ The V4044C and F models are compatible with two-position or modulating control systems, ensuring flexibility in installation․ They are known for their durability and reliability in managing heating and cooling demands․ These valves are typically used in zoned systems, allowing for efficient energy distribution and optimal performance in various applications․

Honeywell V5013 Three-Way Valve

The Honeywell V5013 is a three-way valve designed for controlling hot water, cold water, and glycol solutions (up to 50% concentration) in heating or cooling applications․ It is suitable for two-position or modulating control systems, offering flexibility in system design․ The valve must be installed stress-free, with a tightening torque of 25 to 30 Nm․ It is supplied with mounting instructions for ease of installation․ The V5013 is ideal for hydronic and glycol systems, ensuring precise flow control and reliability․ Its compatibility with various control systems makes it a versatile solution for both residential and small commercial applications․

Safety and Compliance

Ensure safe installation by following guidelines, avoiding incorrect connections, and adhering to international standards․ Compliance with safety regulations is crucial for reliable operation and system protection․

Safety Precautions During Installation and Use

Always follow installation guidelines to ensure safe and proper setup․ Verify correct port connections to avoid system damage or malfunction․ Avoid over-tightening valve connections, as this may cause damage․ Ensure the valve is installed in a stress-free position to prevent mechanical failure․ Do not install the valve on return pipework under any circumstances․ Use appropriate tools and adhere to torque specifications․ Properly wire the actuator to avoid electrical hazards․ Regularly inspect the valve for blockages or wear․ Refer to the manual for specific safety instructions and comply with international standards for safe operation and system protection․

Compliance with International Standards

The Honeywell 3-Port Valve is designed to meet rigorous international standards, ensuring reliability and safety․ It complies with EN 60730 and ASHRAE standards for heating and cooling applications․ Additionally, the valve adheres to environmental regulations such as RoHS, guaranteeing eco-friendly performance․ Honeywell valves are tested to withstand extreme operating conditions while maintaining optimal functionality․ Compliance with these standards ensures seamless integration into global heating and cooling systems․ Proper documentation and certification accompany each valve, verifying its adherence to international norms․ This compliance underscores Honeywell’s commitment to delivering high-quality, globally accepted solutions for diverse applications․

Environmental Considerations

The Honeywell 3-Port Valve is designed with environmental sustainability in mind․ It complies with the Restriction of Hazardous Substances (RoHS) directive, ensuring minimal use of hazardous materials․ The valve’s energy-efficient operation reduces power consumption, contributing to lower carbon emissions․ Honeywell prioritizes eco-friendly manufacturing processes, minimizing waste and emissions during production․ Additionally, the valve’s durable design extends its lifespan, reducing the need for frequent replacements and subsequent resource consumption․ By optimizing system performance, it helps reduce overall energy usage, aligning with global environmental goals․ This focus on sustainability makes the Honeywell 3-Port Valve an environmentally responsible choice for heating and cooling systems․

The Honeywell 3-Port Valve is a reliable, efficient solution for heating and cooling systems, with models like the V4073A, V4044C, and V5013 offering advanced control and durability․

Final Thoughts on the Honeywell 3-Port Valve

The Honeywell 3-Port Valve is a versatile and efficient solution for heating and cooling systems, offering advanced control and reliability․ Models like the V4073A, V4044C, and V5013 provide superior performance in domestic and small commercial applications․ Their durability and compatibility with hydronic and glycol systems make them ideal for diverse setups․

With features like mid-position functionality and modulating control, these valves ensure optimal system performance․ Regular maintenance and adherence to installation guidelines guarantee long-term efficiency․ Whether for radiator control or zoning systems, Honeywell 3-Port Valves deliver consistent reliability, making them a trusted choice for heating and cooling needs․

Recommended Resources for Further Reading

For deeper understanding, refer to Honeywell’s official website for detailed product manuals, such as the V4073A and V5013 valve guides․ Additionally, UserManuals․tech offers free downloads of Honeywell valve manuals․ The Honeywell Valves and Actuators Design and Application Manual provides comprehensive insights into installation and operation․ Specific model documentation, like the V4044C hydronic valve manual, is also available online․ These resources cover technical specifications, troubleshooting, and maintenance tips, ensuring optimal performance and longevity of your Honeywell 3-Port Valve․ Explore these resources for a complete understanding of your system’s capabilities and care requirements․

rental agreement format in tamil pdf free download

A rental agreement is a foundational document outlining the terms and conditions between a landlord and tenant․ It ensures clarity‚ legal compliance‚ and protects both parties’ rights․ Key features include rent details‚ tenure‚ and responsibilities․ Templates in Tamil are widely available online‚ offering ease of use and customization․ They help prevent disputes by providing a clear understanding of obligations and expectations for both parties involved in the tenancy․

1․1 Importance of a Rental Agreement

A rental agreement is essential for protecting the rights and interests of both landlords and tenants․ It clarifies expectations‚ prevents disputes‚ and ensures legal compliance․ By outlining rent‚ tenure‚ and responsibilities‚ it avoids misunderstandings․ Having a written agreement in Tamil simplifies communication for non-English speakers‚ ensuring all parties understand their obligations․ This document also serves as legal proof‚ safeguarding both parties in case of conflicts or breaches of terms․ Its importance lies in maintaining harmony and accountability in tenancy relationships․

1․2 Overview of Rental Agreements in Tamil Nadu

In Tamil Nadu‚ rental agreements are legally binding contracts that outline terms between landlords and tenants․ They typically include details like rent‚ tenure‚ security deposits‚ and maintenance responsibilities․ Registration is mandatory for agreements exceeding 12 months‚ ensuring enforceability under the Tamil Nadu Rent Control Act․ Templates in Tamil are widely used to facilitate understanding for non-English speakers․ These agreements help prevent disputes by clearly defining obligations and expectations‚ promoting a harmonious landlord-tenant relationship in the state․

Legal Requirements for Rental Agreements in Tamil Nadu

Rental agreements in Tamil Nadu must be registered if the tenure exceeds 12 months․ Stamp duty and legal compliance are mandatory for enforceability under the Tamil Nadu Rent Control Act․

2․1 Mandatory Clauses in a Rental Agreement

A rental agreement must include essential clauses like rent amount‚ payment terms‚ security deposit‚ tenancy duration‚ and responsibilities of both parties․ It should outline property maintenance‚ utility obligations‚ and termination criteria․ Clauses regarding rent escalation‚ pet policies‚ and subletting are also crucial․ The agreement must comply with the Tamil Nadu Rent Control Act‚ ensuring legal validity and protecting both landlord and tenant rights․ These clauses provide clarity and prevent potential disputes․

2․2 Registration and Stamp Duty Requirements

In Tamil Nadu‚ rental agreements must be registered under the Tamil Nadu Rent Control Act‚ 1960․ Stamp duty is mandatory‚ typically ranging from 1% to 5% of the annual rent‚ depending on the tenancy duration and rent amount․ Proper registration ensures legal validity‚ preventing future disputes․ Failure to register can lead to complications in court proceedings․ Both parties must sign the agreement‚ and it should be witnessed by two individuals․ Compliance with these requirements safeguards the interests of both landlords and tenants․

Key Components of a Rental Agreement Format

A rental agreement format includes tenant and landlord details‚ property information‚ rent clauses‚ security deposit terms‚ tenancy duration‚ responsibilities‚ and termination conditions․ These elements ensure clarity and fairness․

3․1 Tenant and Landlord Information

The rental agreement must include accurate details of both the tenant and landlord‚ such as full names‚ permanent and current addresses‚ and contact information․ Including identification proofs like Aadhaar or PAN numbers ensures authenticity․ This section establishes accountability and clarity in communication‚ helping to prevent disputes․ Proper documentation of both parties’ information is essential for legal validity and ensures smooth resolution of any future issues․ It also aids in verifying the credibility of both tenant and landlord․ This information is crucial for maintaining transparency throughout the tenancy period․

3․2 Property Details

The rental agreement must clearly specify the property details‚ including the full address‚ type (residential/commercial)‚ and measurements․ It should mention the number of rooms‚ amenities‚ and furnishings provided․ Including details like parking‚ water supply‚ and electricity meter numbers ensures clarity․ For commercial properties‚ specifics like floor plans or shared facilities should be noted․ Accurate property descriptions help prevent disputes and ensure both parties agree on the rented premises․ This section is vital for establishing the scope of the tenancy and the landlord’s responsibilities․ It also aids in resolving any future misunderstandings regarding the property’s condition or amenities․ Proper documentation of property details is legally binding and protects both parties’ interests․

3․3 Rent and Security Deposit Clause

The rental agreement must outline the rent amount‚ payment methods‚ and due dates․ It should specify the security deposit‚ its refund process‚ and conditions for deductions․ Clauses regarding rent hikes‚ late payment penalties‚ and deposit interests should be included․ This section ensures transparency about financial obligations‚ preventing disputes․ It also clarifies the landlord’s responsibility to return the deposit after the tenancy‚ except for valid deductions․ Proper documentation of these terms safeguards both parties’ financial interests and maintains a clear understanding of monetary responsibilities․ This clause is legally binding and crucial for accountability․

3․4 Term and Renewal of Tenancy

The rental agreement specifies the tenancy duration‚ including the start and end dates․ It outlines whether the lease is fixed-term or periodic․ Fixed-term agreements detail the exact period‚ while periodic tenancies automatically renew‚ often monthly or yearly․ The document also includes terms for renewal‚ such as required notice periods for both parties․ Automatic renewal clauses prevent tenancy termination unless either party objects․ This section ensures clarity on the lease timeline‚ protecting both landlord and tenant from unexpected changes or disputes․

3․5 Responsibilities of Tenant and Landlord

The rental agreement clearly outlines the duties of both parties․ Tenants are typically responsible for paying rent on time‚ maintaining the property‚ and adhering to agreed terms․ Landlords must ensure the property is habitable‚ handle major repairs‚ and fulfill legal obligations․ The document also specifies restrictions‚ such as subletting or modifying the property without consent; Clarifying these responsibilities helps prevent disputes and ensures a harmonious tenancy․ Both parties are expected to comply with local laws and respect each other’s rights․

Benefits of Using a Rental Agreement Format in Tamil

Using a Tamil rental agreement format ensures clarity‚ legal compliance‚ and easier understanding for non-English speakers․ It protects both parties’ rights‚ reduces disputes‚ and offers customizable options for specific needs․

4․1 Clarity in Terms and Conditions

A rental agreement in Tamil ensures clarity in terms and conditions‚ preventing misunderstandings․ It outlines rent‚ tenure‚ and responsibilities clearly‚ ensuring both parties understand their obligations․ The use of local language makes it accessible to non-English speakers‚ fostering mutual understanding․ Free downloadable templates in Tamil provide structured formats‚ covering all necessary details like payment terms‚ security deposits‚ and maintenance responsibilities․ This clarity helps avoid disputes and ensures a smooth tenancy experience for both landlords and tenants in Tamil Nadu․

4․2 Protection of Rights for Both Parties

A rental agreement in Tamil protects both landlord and tenant rights by clearly outlining obligations and expectations․ It includes clauses on rent‚ security deposits‚ property maintenance‚ and eviction processes‚ ensuring a balanced power dynamic․ This legal document safeguards against disputes and ensures compliance with local laws․ By having the agreement in Tamil‚ all parties can easily understand their rights and responsibilities‚ fostering a mutually fair and transparent tenancy experience․

4․3 Easy Understanding for Non-English Speakers

Using a rental agreement format in Tamil ensures that non-English speakers can easily comprehend the terms and conditions․ This clarity prevents misunderstandings and ensures both parties fully understand their obligations․ The localized language makes it simpler for tenants and landlords to navigate the legal aspects of the agreement․ By avoiding language barriers‚ it fosters a transparent and professional relationship‚ ensuring everyone involved feels confident and informed about the tenancy terms․

Where to Find Rental Agreement Formats in Tamil PDF

Rental agreement formats in Tamil PDF are available on government websites‚ legal portals‚ and online template providers․ These sources offer free downloads‚ ensuring easy access for users․

  1. Government websites provide standardized templates for official use․
  2. Legal consultancy services offer verified and customizable formats․
  3. Online template providers like LegalDesk ensure easy downloads and printing․

5․1 Government Websites and Legal Portals

Government websites and legal portals are reliable sources for free rental agreement formats in Tamil PDF․ The Tamil Nadu government’s official portals‚ such as TNREGINET‚ provide downloadable templates that comply with state laws․ Legal websites like the District Courts portal and CDMA (Civil District and Munsifs Courts) also offer standardized formats․ These resources ensure easy access to legally valid documents‚ saving time and ensuring accuracy․ They are regularly updated to reflect current legal requirements‚ making them trustworthy for both landlords and tenants․

  • Official government portals like TNREGINET offer free downloads․
  • Legal websites provide standardized and compliant formats․
  • Regular updates ensure adherence to the latest laws․

These platforms are ideal for those seeking reliable and cost-effective solutions․

5․2 Legal Consultancy Services

Legal consultancy services offer reliable rental agreement formats in Tamil PDF‚ ensuring compliance with local laws․ Many firms provide free downloadable templates tailored to Tamil Nadu’s regulations․ These services often include personalized assistance‚ helping users customize the agreement according to their specific needs․ They also ensure that the document is legally sound‚ protecting the rights of both landlords and tenants․ Legal consultancies are a trusted source for accurate and up-to-date rental agreement formats․

  • Customized templates for specific requirements․
  • Expert guidance for legal compliance․
  • Free downloadable formats available online․

These services are ideal for those seeking professional-quality agreements without the hassle of drafting from scratch․

5․3 Online Template Providers

Online template providers offer a wide range of rental agreement formats in Tamil PDF for free download; These platforms cater to various property types‚ ensuring legal compliance and customization options․ Popular providers include legal websites and document-sharing platforms‚ which provide up-to-date templates tailored to Tamil Nadu’s regulations․ Users can easily download and print these formats‚ making the process convenient and efficient․ These services are ideal for individuals seeking professional-quality agreements without the need for legal consultancy‚ ensuring accessibility and simplicity․

  • Wide variety of templates for different property types․
  • Customizable and legally compliant documents․
  • Convenient download and printing options․
  • Cost-effective alternative to legal services․

How to Download and Use Rental Agreement Templates

Visit trusted websites‚ select the desired Tamil rental agreement format‚ and download the PDF․ Fill in the required details‚ print‚ and have both parties sign․ Ensure all terms are clear and legally binding to avoid disputes․

  • Choose a reliable template source․
  • Customize the agreement with accurate information․
  • Print and execute the document formally․

6․1 Step-by-Step Guide to Downloading Templates

To download a Tamil rental agreement template‚ start by visiting trusted legal or real estate websites․ Search for “rental agreement format in Tamil PDF” to find relevant options․ Select a template that suits your needs‚ ensuring it includes all necessary clauses․ Download the PDF‚ fill in the tenant‚ landlord‚ and property details accurately․ Review the terms‚ print the document‚ and have both parties sign it․ Ensure the agreement is legally binding by following local regulations․

  1. Identify reputable websites offering free templates․
  2. Search and select the appropriate Tamil rental agreement format․
  3. Download the template and customize it with accurate information․
  4. Print and execute the agreement with both parties’ signatures․
  5. Verify compliance with local laws for legal validity․

6․2 Customizing the Template for Specific Needs

Customizing a Tamil rental agreement template ensures it meets your specific requirements․ Modify clauses related to rent‚ tenure‚ and responsibilities․ Add property details‚ tenant and landlord information‚ and any unique terms․ Personalize security deposit clauses‚ utility responsibilities‚ and renewal conditions․ Ensure all customizations comply with Tamil Nadu’s legal standards․ Save and print the finalized document for execution․ Regular updates and legal verification are essential to maintain the agreement’s validity and protect both parties’ interests effectively․

  1. Modify clauses to suit specific rental terms․
  2. Add detailed property and party information․
  3. Include unique conditions and security deposit details․
  4. Ensure compliance with local legal requirements․
  5. Review‚ save‚ and print the customized agreement․

Tips for Creating a Comprehensive Rental Agreement

Ensure clarity in terms‚ include all necessary details‚ and avoid ambiguities․ Customize templates to fit specific needs and comply with local laws for a robust agreement․

  • Include clear rent and tenure details․
  • Define responsibilities and security deposit terms․
  • Consult legal experts for accuracy and compliance․

7․1 Including All Necessary Details

A comprehensive rental agreement must include all essential details to avoid disputes; Clearly outline rent‚ tenure‚ security deposit‚ and payment terms․ Specify property description‚ permitted uses‚ and maintenance responsibilities․ Define rules for subletting‚ pets‚ and renovations․ Include clauses for termination‚ renewal‚ and dispute resolution․ Ensure compliance with local laws and customs․ Attach inventory lists or additional terms if needed․ Accuracy and thoroughness protect both parties’ interests and prevent future misunderstandings․

  • Property details and permitted uses․
  • Rent‚ deposit‚ and payment terms․
  • Maintenance and repair responsibilities․
  • Termination and renewal clauses․
  • Dispute resolution mechanisms․

7․2 Avoiding Ambiguities

To prevent conflicts‚ ensure the rental agreement is clear and unambiguous․ Use straightforward language and avoid vague terms․ Clearly define rent payment terms‚ security deposit conditions‚ and tenant responsibilities; Specify penalties for late payments‚ maintenance obligations‚ and notice periods․ Include detailed descriptions of the property and any restrictions․ Ambiguities can lead to disputes‚ so review the document thoroughly․ Legal experts can help ensure clarity and compliance with local laws‚ safeguarding both parties’ interests․

  • Use simple‚ precise language․
  • Define all terms and conditions clearly․
  • Specify penalties and consequences․
  • Include detailed property descriptions․
  • Consult legal experts for clarity․

7․3 Ensuring Compliance with Local Laws

Ensure the rental agreement complies with local laws and regulations in Tamil Nadu․ Include clauses as per the Tamil Nadu Rent Control Act and other applicable legal frameworks․ Verify stamp duty and registration requirements to avoid legal disputes․ Always align the agreement with the Registration Act and local rent control laws․ Non-compliance can lead to penalties or legal issues․ Consult legal experts to ensure the document adheres to current legislation and protects both parties’ interests effectively․

  • Adhere to the Tamil Nadu Rent Control Act․
  • Include necessary legal clauses․
  • Verify stamp duty and registration requirements․
  • Align with the Registration Act․
  • Consult legal experts for compliance․

Common Mistakes to Avoid in Rental Agreements

Common mistakes include omitting key clauses‚ providing incorrect tenant or landlord details‚ and failing to register the agreement․ These errors can lead to legal disputes and financial losses‚ emphasizing the importance of careful drafting and verification․ Always ensure all terms are clear and legally binding to protect both parties’ interests effectively․

8․1 Omitting Key Clauses

Omitting essential clauses in a rental agreement can lead to misunderstandings and legal disputes․ Key clauses often missed include rent payment terms‚ security deposit details‚ termination conditions‚ and maintenance responsibilities․ These omissions can result in one party exploiting loopholes‚ causing financial or property-related conflicts․ To avoid this‚ ensure all critical aspects are clearly defined in the agreement․ Using a reliable rental agreement format in Tamil PDF can help prevent such oversights‚ ensuring both parties’ rights are protected and obligations are clear;

8․2 IncorrectTenant or Landlord Information

Incorrect tenant or landlord information in a rental agreement can lead to serious issues‚ such as payment delays or disputes over property rights․ Common errors include misspelled names‚ outdated addresses‚ or incomplete contact details․ These inaccuracies can complicate legal proceedings or communication․ To avoid such problems‚ ensure all personal and contact information is verified and accurately filled out in the agreement․ Using a reliable rental agreement format in Tamil PDF helps maintain precision and clarity in documenting tenant and landlord details․

8․3 Not Registering the Agreement

Failing to register a rental agreement can lead to legal complications‚ as unregistered documents may not be admissible in court․ This can result in disputes over tenancy terms‚ eviction processes‚ or claims or damages․ Registration ensures authenticity and provides a legal safeguard for both parties․ In Tamil Nadu‚ proper registration is mandatory and typically involves stamp duty payment․ Always verify registration requirements and complete the process to avoid future legal challenges and ensure enforceability of the agreement․ Using a Tamil rental agreement format can guide you through this process effectively․

The Role of e-Signing in Rental Agreements

E-signing streamlines the rental agreement process‚ offering convenience and efficiency․ It allows parties to sign documents remotely‚ saving time and reducing paperwork․ Legally valid and secure‚ e-signatures enhance the agreement’s enforceability while maintaining transparency for both landlords and tenants in Tamil Nadu․

9․1 Convenience and Efficiency

E-signatures simplify the rental agreement process by eliminating the need for physical meetings․ Tenants and landlords can sign documents remotely‚ saving time and effort․ E-signing reduces paperwork‚ accelerates the process‚ and ensures accessibility from anywhere․ It also minimizes delays‚ enabling faster agreement finalization․ This method is particularly beneficial for parties in different locations‚ streamlining communication and reducing the need for in-person coordination․ E-signatures enhance efficiency while maintaining the legal integrity of the agreement‚ making it a preferred choice for modern rentals in Tamil Nadu․

9․2 Legal Validity of E-Signed Agreements

E-signed rental agreements are legally valid and enforceable under the Information Technology Act‚ 2000‚ in India․ Digital signatures ensure authenticity and security‚ making e-signed documents admissible in court․ This method maintains the integrity of the agreement while offering convenience․ E-signatures are recognized as legally binding‚ providing the same protection as traditional wet signatures․ This ensures that both parties’ rights are safeguarded‚ making e-signing a reliable option for rental agreements in Tamil Nadu․

Rental Agreement Formats for Different Types of Properties

Rental agreements vary based on property type‚ such as residential or commercial․ Templates in Tamil cater to specific needs‚ ensuring clarity and compliance for different tenancy requirements․

10․1 Residential Properties

A rental agreement for residential properties in Tamil Nadu outlines terms for housing rentals‚ ensuring clarity between landlords and tenants․ It includes rent‚ security deposits‚ maintenance responsibilities‚ and lease duration․ Templates in Tamil are tailored for apartments‚ houses‚ or villas‚ making it easier for local speakers to understand their obligations․ These agreements also specify utilities‚ parking‚ and other facilities‚ ensuring a smooth tenancy experience while protecting both parties’ interests legally․

10․2 Commercial Properties

A rental agreement for commercial properties in Tamil Nadu is designed for businesses‚ outlining terms like rent‚ lease duration‚ and maintenance․ It includes clauses specific to commercial use‚ such as permitted activities‚ rent escalation‚ and property modifications․ Templates in Tamil cater to shop owners‚ offices‚ and industrial spaces‚ ensuring clarity and legal compliance․ They protect both landlords and tenants by detailing responsibilities and expectations‚ while also allowing customization for unique business needs and operational requirements․

Importance of Legal Consultation

Legal consultation ensures compliance with local laws‚ prevents disputes‚ and protects both parties’ rights‚ making it crucial for a flawless rental agreement process․

11․1 Ensuring Compliance with Laws

Legal consultation ensures that rental agreements comply with local laws‚ such as the Tamil Nadu Rent Control Act‚ and other regulatory requirements․ Experts review clauses to prevent legal oversights‚ ensuring the agreement aligns with current legislation․ This process safeguards both parties from potential disputes and penalties‚ providing a legally binding document․ Proper compliance also fosters trust and understanding‚ making the tenancy process smoother and more transparent for all involved․

11․2 Resolving Disputes

Legal consultation plays a crucial role in resolving disputes between tenants and landlords․ Experts provide guidance on interpreting rental agreements‚ ensuring both parties understand their rights and obligations․ Mediators or arbitrators can facilitate negotiations to reach mutually acceptable solutions; A well-drafted rental agreement in Tamil helps prevent misunderstandings by clearly outlining responsibilities‚ reducing the likelihood of conflicts․ Professional legal advice ensures that disputes are addressed efficiently‚ maintaining harmony and avoiding prolonged legal battles․

A rental agreement format in Tamil PDF ensures clarity‚ security‚ and ease for both landlords and tenants․ Using these templates is a wise decision for seamless renting experiences․

12․1 Final Thoughts on Using Rental Agreement Formats

Using a rental agreement format in Tamil PDF ensures clarity‚ legal compliance‚ and mutual understanding․ It safeguards both parties’ rights and minimizes disputes․ Templates are easily accessible online‚ offering customization options to suit specific needs․ They provide a structured approach to tenancy agreements‚ ensuring all essential details are included․ Regular updates and legal consultations are recommended to maintain relevance and adherence to local laws․ This approach fosters trust and transparency‚ making it a practical solution for landlords and tenants in Tamil Nadu․

heat-n-glo gas fireplace manual

Welcome to the Heat-N-Glo Gas Fireplace Manual‚ your essential guide to safe installation‚ operation‚ and maintenance. This manual ensures optimal performance‚ efficiency‚ and safety. Follow guidelines for proper setup‚ usage‚ and troubleshooting to enjoy your fireplace safely and efficiently.

1.1 Overview of the Heat-N-Glo Gas Fireplace

The Heat-N-Glo gas fireplace is a high-quality‚ efficient appliance designed to provide warmth and ambiance to your home. It combines advanced technology with sleek designs‚ offering a realistic flame appearance and consistent heat output. This fireplace is built with safety and reliability in mind‚ featuring robust construction and user-friendly controls. Whether you prefer a traditional or modern aesthetic‚ Heat-N-Glo models cater to various decor styles. The appliance is engineered to meet rigorous safety standards‚ ensuring a secure and enjoyable experience. By following the manual’s guidelines‚ you can optimize its performance and extend its lifespan. This overview highlights the key features and benefits‚ helping you understand how to make the most of your Heat-N-Glo gas fireplace.

1.2 Key Features and Benefits

The Heat-N-Glo gas fireplace offers exceptional energy efficiency‚ eco-friendly performance‚ and a realistic flame experience. Its advanced ignition system ensures safe and reliable operation‚ while the durable construction guarantees long-lasting reliability. The fireplace features customizable designs to match various home styles‚ from traditional to modern. Key benefits include low maintenance‚ easy operation‚ and consistent heat output. Safety features like automatic shut-off and secure ignition systems provide peace of mind. The appliance is also designed to comply with environmental standards‚ making it an eco-conscious choice. With its sleek designs and innovative technology‚ the Heat-N-Glo gas fireplace enhances both comfort and aesthetics in your home‚ delivering a superior heating experience.

Safety Precautions and Guidelines

Ensuring safety is paramount. Always follow the manufacturer’s guidelines for installation and operation. Regular inspections and adherence to local regulations are crucial for safe functionality and longevity.

2.1 General Safety Tips for Gas Fireplaces

Always ensure your Heat-N-Glo gas fireplace is installed by a certified professional to meet safety standards. Follow the manufacturer’s instructions and local building codes. Keep flammable materials at least 3 feet away from the fireplace. Never leave children or pets unattended near an operating fireplace. Ensure proper ventilation to avoid gas buildup. Regularly inspect gas lines and connections for leaks or damage. If you suspect a gas leak‚ open windows‚ exit the premises‚ and contact your gas supplier or fire department immediately. Refer to the manual for specific safety guidelines tailored to your model. Annual inspections by a qualified technician are essential to maintain safety and efficiency. Remember‚ safety precautions are non-negotiable to protect your home and loved ones.

2.2 Ventilation Requirements

Proper ventilation is crucial for the safe and efficient operation of your Heat-N-Glo gas fireplace. Ensure your fireplace is equipped with a direct vent system‚ which vents combustion gases directly outside. Install vents according to the manufacturer’s specifications and local building codes. Never operate the fireplace without a properly functioning venting system‚ as this can lead to dangerous carbon monoxide buildup. Keep vents clean and free from obstructions‚ such as debris or nests. Annual inspections by a qualified technician are recommended to ensure the venting system is in good working condition. Proper ventilation not only enhances safety but also improves heating efficiency and reduces the risk of mechanical failures.

2.3 Emergency Shutdown Procedures

In case of an emergency‚ such as a gas leak‚ unusual odor‚ or flame malfunction‚ follow these steps to shut down your Heat-N-Glo gas fireplace safely. First‚ immediately turn off the fireplace using the control knob or remote. Next‚ close the main gas valve to stop fuel supply. Open windows and doors to ventilate the area thoroughly. Do not attempt to relight the fireplace or investigate the issue yourself. Contact a qualified technician or your gas supplier for assistance. If you smell gas‚ leave the premises and call the fire department or emergency services. Always prioritize safety and avoid risky situations. Regular maintenance and inspections can help prevent such emergencies‚ but being prepared is essential for your well-being and property protection.

Installation Requirements

Ensure proper installation by following local building codes and regulations. Hire a certified professional for gas and electrical connections. Verify ventilation requirements and clearances for safe operation.

3.1 Pre-Installation Checklist

Before installing your Heat-N-Glo gas fireplace‚ ensure compliance with local building codes and safety standards. Verify proper ventilation and chimney requirements. Inspect the installation site for any obstructions or hazards. Check gas line compatibility and ensure electrical connections meet specifications. Confirm the fireplace dimensions match the allocated space. Review the manufacturer’s guidelines for clearance from combustible materials. Ensure all necessary tools and materials are available. Consult local authorities for permits if required. Lastly‚ confirm that a certified professional will handle the installation to guarantee safety and efficiency.

3.2 Step-by-Step Installation Guide

Begin by preparing the installation site‚ ensuring it is clear of debris and obstructions. Carefully unpack the fireplace components‚ verifying all parts are included. Follow the manufacturer’s instructions to assemble the unit‚ starting with the base and moving upwards. Connect the gas line to the fireplace‚ ensuring all fittings are secure and leak-free. Install the venting system according to the manual‚ making sure it is properly sealed and vented outdoors. Connect any electrical components‚ adhering to local wiring regulations. Position the fireplace in the designated area‚ ensuring proper clearance from walls and ceilings. Finally‚ test the ignition system and ensure all safety features are functioning correctly before first use.

3.3 Compliance with Local Building Codes

Ensuring compliance with local building codes is crucial for the safe and legal installation of your Heat-N-Glo gas fireplace. Always consult your local authorities to verify specific requirements‚ as regulations may vary by region. The manual provides general guidelines‚ but adherence to local standards is mandatory. This includes proper ventilation‚ clearance distances‚ and electrical connections. Obtain necessary permits before installation and schedule inspections as required. Failure to comply may result in safety hazards or legal consequences. By following both the manual and local codes‚ you ensure a safe‚ efficient‚ and lawful installation. Professional installation is recommended to guarantee all requirements are met.

Operating the Heat-N-Glo Gas Fireplace

Learn how to safely ignite‚ adjust flame height‚ and control heat output for optimal performance. Understand fuel types‚ efficiency settings‚ and daily operation best practices.

4.1 Ignition and Start-Up Process

Ensure the gas supply is turned on and the area is well-ventilated. Locate the ignition switch‚ typically found on the control panel or beneath the fireplace. Turn the switch to the “pilot” position and press the ignition button until the pilot light ignites. Once the pilot is lit‚ slowly turn the knob to the “on” position to start the main flame. Always follow the manufacturer’s instructions for the ignition process. Allow a few minutes for the fireplace to reach optimal operation. If the pilot light does not stay lit‚ check for obstructions or consult the troubleshooting section. Never attempt to ignite the fireplace without ensuring all safety precautions are in place. Refer to your manual for specific start-up procedures tailored to your model.

4.2 Adjusting Flame Height and Heat Output

To adjust the flame height and heat output on your Heat-N-Glo gas fireplace‚ locate the control knob or valve‚ typically found on the control panel or near the fireplace. Turn the knob to the desired flame height‚ ensuring the flame remains stable and even. For heat output adjustment‚ some models feature a variable control system‚ allowing you to customize warmth levels. Always monitor the flame to avoid excessive height‚ which could lead to inefficiency or safety risks. Adjustments should be made slowly and carefully to maintain optimal performance. Refer to your manual for specific instructions‚ as controls may vary by model. Proper adjustment ensures both aesthetic appeal and energy efficiency‚ enhancing your overall experience with the fireplace.

4.3 Fuel Type and Efficiency

Your Heat-N-Glo gas fireplace is designed to operate efficiently with natural gas or propane‚ depending on the model and installation. Natural gas is the most common fuel type‚ while propane is ideal for areas without natural gas access. The fireplace is engineered to maximize fuel efficiency‚ converting a high percentage of fuel into usable heat. This is achieved through advanced combustion technology and precise fuel-to-air ratios. Regular maintenance‚ such as cleaning burners and ensuring proper ventilation‚ helps maintain efficiency. Always use the fuel type specified in your manual to ensure optimal performance and safety. Proper fuel utilization not only enhances heating efficiency but also minimizes energy waste‚ making your Heat-N-Glo fireplace an eco-friendly and cost-effective heating solution.

Maintenance and Upkeep

Regular cleaning‚ inspections‚ and part replacements ensure optimal performance. Check for damage‚ clean burners‚ and ensure proper ventilation. Annual servicing by professionals is recommended for safety and efficiency.

5.1 Cleaning the Fireplace and Surroundings

Regular cleaning is crucial for maintaining efficiency and safety. Turn off the fireplace and allow it to cool completely before cleaning. Use a soft brush or vacuum to remove dust and debris from vents and surfaces. Clean glass doors with a glass cleaner specifically designed for fireplaces to avoid streaks. Inspect burners for blockages and ensure proper airflow. Wipe surrounding areas with a damp cloth to prevent soot buildup. Avoid using abrasive materials that could damage finishes. Check for any signs of wear or damage‚ such as cracks or rust‚ and address them promptly. Cleaning not only enhances appearance but also ensures safe and optimal performance of your Heat-N-Glo gas fireplace.

5.2 Replacing Parts and Accessories

Replacing parts and accessories for your Heat-N-Glo gas fireplace ensures optimal performance and safety. Always turn off the gas supply and disconnect power before starting any replacement. Identify the specific part needing replacement by consulting the manual or manufacturer’s website. Use genuine Heat-N-Glo parts to maintain warranty and safety standards. Follow the manual’s instructions for dismantling and installing components. For complex replacements‚ such as burners or ignition systems‚ consider consulting a professional. After installation‚ restore gas and power‚ then test the fireplace to ensure proper function. Regular part replacement prevents hazards and maintains efficiency‚ ensuring your fireplace operates safely and effectively for years to come.

5.3 Annual Servicing and Inspections

Annual servicing and inspections are crucial for maintaining your Heat-N-Glo gas fireplace’s efficiency and safety. Hire a qualified technician to perform a thorough check‚ ensuring all components are in good condition. The technician will inspect the venting system for blockages‚ clean the burner and ignition system‚ and check for gas leaks. They will also verify that all safety features are functioning properly. Regular servicing prevents potential hazards‚ such as carbon monoxide leaks‚ and ensures optimal performance. Schedule this maintenance annually‚ preferably before the heating season‚ to guarantee your fireplace operates safely and effectively. Keep a record of all inspections and servicing for future reference and warranty purposes.

Troubleshooting Common Issues

This section helps identify and resolve common problems with your Heat-N-Glo gas fireplace‚ such as ignition failure‚ gas odors‚ or error codes. Refer to your manual for solutions or contact a professional if issues persist.

6.1 Diagnosing Common Problems

Diagnosing common issues with your Heat-N-Glo gas fireplace involves identifying symptoms and referring to your manual for solutions. Start by checking for ignition failures‚ unusual odors‚ or error codes. Ensure proper gas supply and ventilation. If the fireplace doesn’t light‚ inspect the pilot light and ignition system. For gas odors‚ turn off the supply and ventilate the area. If error codes appear‚ consult the troubleshooting chart in your manual. Regular maintenance‚ like cleaning burners and checking for blockages‚ can prevent many issues. If problems persist‚ contact a certified technician for professional assistance. Always prioritize safety and follow manufacturer guidelines when diagnosing or repairing your fireplace.

6.2 DIY Repair Tips

For minor issues with your Heat-N-Glo gas fireplace‚ DIY repairs can be effective. Always refer to your manual for specific instructions. Start by ensuring the gas supply and power are turned off before attempting any repairs. Clean the burner ports and vents regularly to prevent blockages. If the pilot light won’t stay lit‚ check for drafts or debris. Inspect ignition wires for damage and replace them if necessary. Ensure proper ventilation to avoid gas buildup. For non-technical issues‚ like adjusting logs or tightening loose connections‚ follow the manual’s guidance. However‚ for complex problems or gas leaks‚ always contact a certified technician to ensure safety and compliance with manufacturer standards.

6.3 When to Call a Professional

If you encounter issues beyond basic troubleshooting‚ it’s crucial to call a certified professional. Gas leaks‚ malfunctioning valves‚ or improper venting require expert attention. If the fireplace doesn’t light or the flame appears unusual‚ a professional can diagnose and fix the issue. Additionally‚ if you notice unusual noises‚ excessive soot‚ or a strong gas smell‚ immediate assistance is needed. Annual inspections should also be performed by a qualified technician to ensure safety and efficiency. Never attempt complex repairs yourself‚ as this can void the warranty or pose serious safety risks. Always rely on Heat-N-Glo authorized service providers for reliable and safe solutions.

Technical Specifications

This section provides detailed technical specifications‚ including BTU output‚ efficiency ratings‚ and compatibility with various gas types‚ ensuring optimal performance and installation flexibility.

7.1 Dimensions and Weight

The Heat-N-Glo gas fireplace is designed to fit various spaces‚ with dimensions tailored for standard installations. Typical models range in width from 30 to 50 inches‚ depending on the series‚ and depth around 18 inches for easy wall or corner placement. The unit’s weight varies between 100 to 250 pounds‚ ensuring stability and durability. Exact dimensions and weight are provided in the manual to ensure proper installation and venting. These specifications are crucial for planning and executing a safe and efficient setup‚ allowing homeowners to enjoy their fireplace without compromising space or safety. Always refer to the manual for precise measurements before installation or purchase.

7.2 BTU Output and Efficiency Ratings

The Heat-N-Glo gas fireplace offers a range of BTU outputs to suit different heating needs‚ typically between 20‚000 to 50‚000 BTUs per hour. These units are designed for high efficiency‚ with AFUE ratings often exceeding 70%‚ ensuring minimal energy waste. The efficiency ratings vary by model‚ with some models achieving up to 85% efficiency‚ making them an eco-friendly choice. Higher BTU models are ideal for larger spaces‚ while lower BTU options are perfect for smaller areas. The manual provides detailed specifications for each model‚ including BTU output and efficiency ratings‚ to help homeowners choose the right unit for their needs. Always consult the manual to ensure optimal performance and energy savings.

7.3 compatibility with Various Gas Types

7.3 Compatibility with Various Gas Types

The Heat-N-Glo gas fireplace is designed to operate with natural gas and propane‚ ensuring versatility for different fuel sources. Proper installation and configuration depend on the gas type being used. The manual provides specific guidelines for converting the unit between natural gas and propane‚ including orifice adjustments and regulator settings. Always use the correct gas type for your model to ensure safe and efficient operation. Improper gas type usage can lead to performance issues or safety hazards. Refer to the manual for detailed instructions on gas compatibility and conversion procedures. Additionally‚ consult local gas suppliers to ensure compliance with regional fuel standards and regulations.

Environmental Considerations

This section covers environmental impact‚ emissions reduction‚ and eco-friendly features of your Heat-N-Glo gas fireplace‚ ensuring energy efficiency and sustainable operation while adhering to environmental standards and recycling guidelines.

8.1 Emissions and Eco-Friendliness

The Heat-N-Glo gas fireplace is designed to minimize environmental impact through reduced emissions and eco-friendly operation. It incorporates advanced combustion technology to ensure clean-burning fuel efficiency‚ lowering harmful emissions. The appliance adheres to strict environmental standards‚ making it a sustainable choice for home heating. By utilizing energy-efficient designs‚ the fireplace contributes to eco-conscious heating solutions while maintaining optimal performance. Proper installation and maintenance further enhance its eco-friendliness‚ ensuring minimal environmental footprint and compliance with energy efficiency regulations. This section emphasizes the importance of eco-friendly features and emissions reduction‚ aligning with environmental conservation goals and promoting responsible energy use.

8.2 Energy Efficiency Standards

The Heat-N-Glo gas fireplace is engineered to meet rigorous energy efficiency standards‚ ensuring optimal performance while minimizing energy consumption. Designed with advanced technologies‚ the fireplace achieves high Annual Fuel Utilization Efficiency (AFUE) ratings‚ making it a cost-effective and eco-conscious choice. By adhering to industry certifications and regulations‚ the appliance guarantees reliable and energy-efficient operation. Features such as direct vent systems and precise burner controls contribute to its superior efficiency. Regular maintenance‚ as outlined in the manual‚ helps maintain these standards‚ ensuring consistent performance over time. This focus on energy efficiency not only reduces energy bills but also aligns with global efforts to promote sustainable and responsible energy use.

8.3 Recycling and Disposal Guidelines

Proper recycling and disposal of your Heat-N-Glo gas fireplace components are essential for environmental protection. Always follow local regulations and guidelines when handling gas-related materials. Disconnect and safely seal gas lines before disassembling the unit. Recyclable parts‚ such as metal components‚ should be separated and taken to authorized recycling centers. Non-recyclable materials must be disposed of responsibly‚ adhering to hazardous waste protocols if applicable. Consult the manual for specific instructions on handling specialized parts. Improper disposal can harm the environment‚ so ensure all steps align with eco-friendly practices. Contact local authorities or certified professionals for assistance with complex disposal tasks. By adhering to these guidelines‚ you contribute to sustainable waste management and environmental conservation.

Proper usage and maintenance ensure efficiency and safety. Access support resources for assistance. Enjoy your Heat-N-Glo fireplace with confidence and warmth‚ enhancing your home ambiance effectively.

9.1 Importance of Proper Usage and Maintenance

Proper usage and maintenance are crucial for ensuring the safety‚ efficiency‚ and longevity of your Heat-N-Glo gas fireplace. Adhering to the guidelines outlined in this manual helps prevent accidents‚ optimizes performance‚ and extends the lifespan of your appliance. Regular inspections and cleaning ensure reliable operation‚ while following usage instructions maintains energy efficiency. Proper maintenance also safeguards your warranty‚ ensuring coverage for repairs when needed. Always refer to the manual for specific care instructions‚ and consult professionals for complex tasks. By prioritizing proper practices‚ you enhance safety‚ efficiency‚ and enjoyment‚ making your Heat-N-Glo fireplace a lasting and reliable addition to your home.

9.2 Accessing Support and Resources

For any questions or concerns regarding your Heat-N-Glo gas fireplace‚ accessing support and resources is straightforward. The Heat-N-Glo Owner Support Center offers a wealth of information‚ including product registration‚ customer service contact details‚ and answers to frequently asked questions. You can also download manuals‚ installation guides‚ and parts lists by entering your model number or name on their official website. Additionally‚ the website provides troubleshooting tips and maintenance advice to help you resolve common issues independently. For more complex problems or emergencies‚ contacting Heat-N-Glo’s customer service directly ensures professional assistance. Remember to always follow the manufacturer’s guidelines and safety protocols for optimal performance and safety.